Tuesday, 1 December 2015

Christmas is on the way! Mini Santa hat free pattern


I'm not a great one for preparing for Christmas too early, but when it gets to the 1st of December I start to feel more seasonal. To celebrate, I'm going to be posting a few simple, free crochet patterns over the next few days. They'll all be quick and easy to make, and could be useful for a few Christmas extras, for decoration, adding to your gift wrapping, or for mini presents.

Last year I made my crochet Daleks a bit more festive by making them mini Santa hats, so here’s the pattern so you can use it for your Daleks (pattern here), or other small toys. It will also fit figures made from my Halfling, Elf and Dwarf patterns.

If you use double knitting weight yarn the hat will have a circumference of about 21cm/8”. If you’ve made a Dalek or figure using a thicker yarn, use that same thickness of yarn for the hat so it will fit.

Abbreviations:
ch = chain
st = stitch or stitches
sc = single crochet (US), double crochet (UK)
FO = fasten off

General instructions:
Work in rounds and through both loops of stitches. Use a stitch marker to mark the start of a round - a small piece of different coloured yarn placed under the stitch at the start of the round will do. To start the first round, you can use the magic ring method, but I prefer (ch 2, work 6 sc into 1st ch). If you work the 6 sc over the tail of yarn as well you can use that to pull the hole tight.

You will need:
Approx 10 – 15g red yarn, double knitting weight.
Small amount of white yarn, double knitting weight.
(Optional: use fuzzy white yarn for the edge, you will still need ordinary yarn for the bobble.)
3.5mm (E) hook.
Tapestry needle.
Fork with four tines.

Hat:
Start using red yarn.
Round 1: Ch 2, work 6 sc into 1st ch – 6 st.
Round 2: Sc in each st around – 6 st.
Round 3: [2 sc in next st, sc in next 2 st] 2 times – 8 st.
Round 4: [2 sc in next st, sc in next 3 st] 2 times – 10 st.
Round 5: [2 sc in next st, sc in next 4 st] 2 times – 12 st.
Round 6: [2 sc in next st, sc in next 5 st] 2 times – 14 st.
Round 7: [2 sc in next st, sc in next 6 st] 2 times – 16 st.
Round 8: [2 sc in next st, sc in next 7 st] 2 times – 18 st.
Round 9: [2 sc in next st, sc in next 5 st] 3 times – 21 st.

Round 10: Sc in each st around – 21 st.
Round 11: [2 sc in next st, sc in next 6 st] 3 times – 24 st.
Round 12: Sc in each st around – 24 st.
Round 13: [2 sc in next st, sc in next 7 st] 3 times – 27 st.
Round 14: Sc in each st around – 27 st.
Round 15: [2 sc in next st, sc in next 8 st] 3 times – 30 st.
Round 16: Sc in each st around – 30 st.
Round 17: [2 sc in next st, sc in next 9 st] 3 times – 33 st.
Round 18: Sc in each st around – 33 st.
Round 19: [2 sc in next st, sc in next 10 st] 3 times – 36 st.
Round 20: Sc in each st around – 36 st.
Round 21: [2 sc in next st, sc in next 11 st] 3 times – 39 st.
Round 22: Sc in each st around – 39 st.
Round 23: [2 sc in next st, sc in next 12 st] 3 times – 42 st.
Round 24: Sc in each st around – 42 st.
Change to white or white fuzzy yarn.
Round 25 - 26: Sc in each st around – 42 st.
FO and weave in ends.

Bobble:
Using white yarn make a tiny pompom by wrapping the yarn around a fork about 12 times. Cut yarn and then tie another length of white yarn around the middle with a double knot. Remove from fork and cut the loops in the pompom and trim neatly to the right size for the hat. Sew the length of yarn through the middle of the pompom a few times to secure it, then sew to the point of the hat.

If you like, fold the point of the hat over and sew in place with a couple of stitches (use the red yarn from where you started making the hat).

If you want to hat to fit something slightly smaller or larger, just stop when it’s large enough, or keep increasing in the same way until it’s large enough.

Monday, 30 November 2015

Star Wars Crochet in Spanish

I've recently been sent a copy of my Star Wars Crochet book that has now been published in Spanish. I can't speak Spanish myself, but here are all the details on the publisher's website.


Mi libro Star Wars ganchillo está ahora disponible en español. Todos los detalles aquí en el sitio web de la editorial: http://www.planetadelibros.com/kit-star-wars-crochet-libro-201117.html

Wednesday, 21 October 2015

Yeti and Bigfoot Amigurumi Pattern


When I first started designing patterns I often made things using fuzzy mohair type yarn, which I then brushed to make cute, furry creatures, including my Adorable Monsters. Unfortunately, mohair yarns have become a lot less fashionable since then, and you can often only find very lightweight ones, which are no good for making amigurumi at a reasonable size. I did make some Adorable Monsters using normal yarn, but I decided to have another go, and make a little Yeti and Bigfoot.

I still wanted to give their fur a bit of texture, so this time I used Stylecraft Alpaca DK, an acrylic yarn with 20% alpaca in the mix. I find it works well for amigurumi animals as it has a really nice, soft and furry feel to it - I used it for my Alpaca Family and Bracken the Fox.

I made a little Bigfoot, tweaking the pattern slightly to give it a thumb, and I was really happy with the way it looked. I then thought it would be nice to have a larger version, something it would be a bit easier to cuddle. If you want to make a larger version of an amigurumi, there isn't any formula to do it. You just have to work your way through it, with an idea of what you want it to look like, and use trial and error to get it right. And some things don't scale up easily - it took a while to work out how to make the bigger fingers and toes when the popcorn stitches I used were just the right size for the original. I decided to make the big version with proportionally longer legs, but otherwise they're very similar.


Once I was happy with both the patterns, I made a pair of Yeti to go with the Bigfoots (Bigfeet?). As I was making the little one, I decided to see what the feet would look like sewn to the front, so it's sitting down, and I thought it looked really cute. The standing version of the little Bigfoot is only 6 inches tall, so the little sitting Yeti fits in your hand rather nicely. The bigger versions are 9 inches tall, and definitely just right for a cuddle.


So, if you'd like to make yourself a cute monster family, you can get the pattern from Etsy or Ravelry. I think they're cute on their own, but even cuter together.


Wednesday, 7 October 2015

Salacious Crumb - free pattern


My book, Star Wars Crochet, has just been republished in the US, and so should be available on Amazon and in other book and craft stores. When it was first released, earlier this year, it was also stocked on UK Amazon, so hopefully you'll be able to find it there soon as well.


The book includes the pattern for Jabba the Hutt, but there wasn't room to fit in his little pal, Salacious Crumb, so here it is for free! Salacious Crumb is a mischievous and annoying character, something between a monkey and a lizard, who is essentially Jabba's court jester. This crochet version is pretty small, only 2" tall when sitting, and is made all in one piece, with minimal sewing to complete him.


You will need:
Approx 5g beige yarn, double knitting weight.
Small amounts of black and russet brown yarn.
Stuffing.
Tapestry needle.
3.5mm hook (US E hook).

Abbreviations:
ch = chain
st = stitch or stitches
ss = slip stitch
sc = single crochet (US), double crochet (UK)
dc = double crochet (US), treble crochet (UK)
bob = bobble (see special stitch instructions)
tog = together
sc2tog = decrease by working two sc together
FO = fasten off

Note on yarn:
Double knitting (DK) yarn is standard in the UK, but in other parts of the world, such as the US, worsted weight is more commonly used. Worsted weight is a little thicker than DK but can easily be substituted and the pattern will still be in proportion, although you may find it necessary to use a hook one size larger.

Special stitch instructions:

2 dc bob: YOH (yarn over hook), insert hook into next stitch, YOH and pull through loop, YOH, pull through 2 loops, YOH, insert hook into same stitch, YOH and pull through loop, YOH, pull through 2 loops, YOH, pull through all 3 loops on hook.

3 dc bob: YOH (yarn over hook), insert hook into next stitch, YOH and pull through loop, YOH, pull through 2 loops, *YOH, insert hook into same stitch, YOH and pull through loop, YOH, pull through 2 loops, repeat once from*, YOH, pull through all 4 loops on hook.

Salacious Crumb is made in one piece in rounds from the top of the head down. Do not join rounds unless told to, use a stitch marker to mark the start of a round - a small piece of different coloured yarn placed under the stitch at the start of the round will do. To start a round, you can use the magic ring method, but I prefer (ch 2, work 6 sc into 1st ch). If you work the 6 sc over the tail of yarn as well you can use that to pull the hole tight.

Work through both loops of stitches unless otherwise indicated.

Pattern Instructions:
Start using beige yarn.
Round 1: Ch 2, work 6 sc into 1st ch - 6 st.
Round 2: [2 sc in next st, sc in next st] 3 times – 9 st.

Round 3: 2 sc in next st, [ear: ss into next st, ch 5, miss ch next to hook, ss into next 2 ch, sc into next 2 ch, ss back into original st], sc in next st, 2 sc in next st, sc in next 2 st, [ear], 2 sc in next st, sc in next st - 12 st.
Round 4: [2 sc in next st, sc in next 3 st] 3 times – 15 st.
Round 5: Sc in next 7 st, change to black yarn 3dc bob in next st, change to beige yarn sc in next 7 st - 15 st.
Round 6: 2 sc in next st, sc in next 3 st, 2dc bob in next st, 2 sc in next st, sc in next 4 st, 2 sc in next st, 2dc bob in next st, sc in next 3 st - 18 st.
Round 7: Sc2tog 9 times – 9 st.
Round 8: Sc in each st around - 9 st.
Round 9: Sc in next 3 st, [arm: ss into next st, ch 10, 3dc bob into 3rd ch from hook, ss into next 7 ch, ss back into original st], sc in next 3 st, [arm], sc in next st - 9 st.
Round 10: [2 sc in next st, sc in next 2 st] 3 times – 12 st.
Round 11: [2 sc in next st, sc in next 3 st] 3 times – 15 st.
Round 12: [2 sc in next st, sc in next 4 st] 3 times – 18 st.
Round 13: Sc in next 4 st, [tail: ss into next st, ch 15, miss ch next to hook, ss into next 14 ch, ss back into original st], sc in next 13 st - 18 st.
Round 14: Sc2tog, sc in next 4 st, sc2tog, sc in next 2 st, [leg: ss into next st, ch 11, miss ch next to hook, sc into next 2 ch, miss next ch, ss into next 7 ch, ss back into original st], sc in next st, sc2tog, sc in next 2 st, [leg], sc in next st - 15 st.

Stuff head and body. Push the bobbles on the face outwards and embroider eyes and mouth using black yarn.

Round 15: [Sc2tog, sc in next 3 st] 3 times – 12 st.
Round 16: Sc2tog 6 times – 6 st.

FO, leaving length of yarn. Sew up hole at bottom then take the yarn through the body to the head and sew a couple of stitches into base of ears to keep them closer to head.

To make the fluffy parts you will sew loops of yarn on the top of the head and around the neck. Thread a length of russet brown yarn onto your needle and take the yarn through the crocheted part, leaving a short length of yarn sticking out. Sew a stitch in the same place. Sew a loop next to this, then sew a stitch in the same place to secure it. Make 3-4 loops on the top of the head and 5-6 loops around the neck, leaving a gap at the front. Cut each loop and trim to length. Take the point of the needle through each strand to separate it and create a fluffy effect.


Thursday, 10 September 2015

Dwarf amigurumi pattern


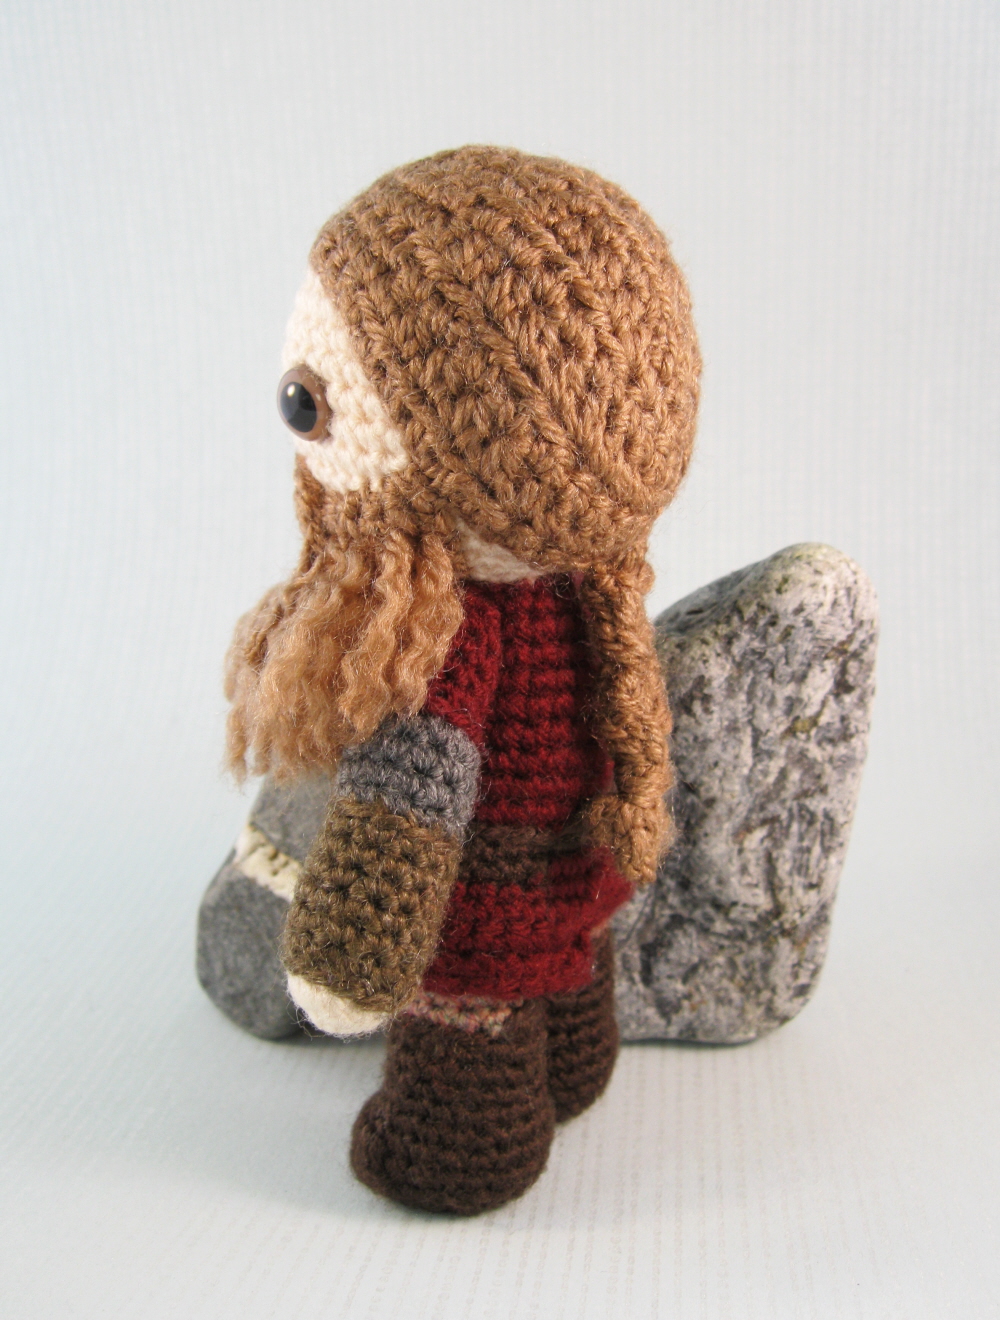
My latest pattern, to make a selection of crochet Dwarves, is finally finished. I started working on this pattern nearly two years ago, but it kept getting put aside for other projects, and I rather lost the urge to get on with it. Then recently, when I was deciding which pattern to work on next, I looked at the one dwarf I had already made, and figured I might as well finish what I'd started and design a few more companions for him. Once I got started I really enjoyed coming up with different looks for the dwarves, and was very glad that I had chosen to work on this pattern!


I made five different dwarves, two female and three male, with all sorts of different looks and accessories. They fit with my other fantasy amigurumi characters, the slightly taller Elves and the smaller Halflings. Dwarves are another classic fantasy race, originally found in Norse and Germanic myths, that have become solidified in modern imagination from books such as The Hobbit and C. S. Lewis' stories of Narnia. They now feature in all sorts of films, books, and especially role playing games, both computer ones and table-top versions such as Dungeons and Dragons.


Dwarves are usually portrayed as being short and stocky, with impressive beards. Female dwarves do not appear so much in literature and film, and so there is no tradition of how they appear. Sometimes, as in Terry Pratchett's Discworld, they are indistinguishable from male dwarves, but games usually show them as bare faced. They don't feature except as background characters in Peter Jackson's Hobbit films, but I was interested to see that he gave them just hints of facial hair. I made my female dwarves without beards, just to show what they'd look like, and so as not to hide the different shape of their bodies, but there's no reason they couldn't have beards as well.


Most stories about dwarves tend to agree that they live underground, and are experts at mining and working metal. They are usually considered to be tough, and good at fighting, so I made my dwarves with warm, practical clothes (mostly crocheted as part of their bodies), including leather belts and wrist guards. I also included extra items that are made separately, such as a sleeveless coat, a simple cloak and a warm hat.


The pattern contains all the details to make these five characters, with different clothes, three different hairstyles (pulled back, loose, and spiky and shaved at the sides), and two sizes of beard. You can also make armour and weapons for them - there is a pattern for a helmet, with or without wings, a round shield, an axe and a war hammer.


You can buy this pattern from Etsy, Ravelry or LoveCrochet. Use all these details to make a dwarf look the way you want, by mixing and matching the different elements and accessories. If anyone makes one themselves, I'd love to see what your dwarf looks like!

Thursday, 9 July 2015

Multicoloured Tunisian Crochet Cushion

It's nice to take a break from making amigurumi, and I had been keen to try Tunisian crochet, so I gave it a go. I tried out the technique, using my interchangeable hooks and cables from KnitPro, but it felt a bit awkward compared to normal crocheting. I decided that I needed to work on an actual project to really get the hang of it, and thought the easiest thing to make would be a cushion cover.


I grabbed a selection of brightly coloured yarns, double knitting weight, and a 5mm hook, and set to work. After a bit of experimenting I worked out that I needed 99 stitches to make a piece of crochet wide enough to cover my 50cm/20" cushion insert that I'd bought from Ikea, and I worked two forward and return passes of simple stitch for each colour, starting each new colour on the return pass. Here's a good basic guide to Tunisian crochet by Simply Crochet.


I tried to use the colours fairly randomly to give a fun, striking look to the cushion. I just kept going until the piece was long enough to fold over and fit the insert, with a bit of overlap to put buttons on. I definitely got the hang of Tunisian crochet by the end of it, and it was the perfect texture for a cushion cover - lovely and thick with no holes.


If you've never tried Tunisian crochet, I'd definitely recommend giving it a go - you could always try something much smaller, like a case for a phone or your sunglasses. My cushion is now brightening up my new craft room, and coming outside with me when I'm enjoying the sun.

Tuesday, 30 June 2015

Cuddly Dragon Amigurumi Pattern

I really do love dragons, and I love to make crochet patterns for them. One of my very first patterns was my Fierce Little Dragon and then I made a larger Dragonet  initially inspired by my love of the dragons and fire lizards of Pern. With my latest pattern I've tried to make dragons that are cuddly rather than fierce or majestic.


Cuddly they might be, but they still have horns, claws and spikes down their backs, along with a pair of cute little wings. They're fun to make in any colour you like - I found yarns with a bit of a mix of colours, like James C Brett Marble, gave a really nice effect.


The pattern is available on Etsy, Ravelry and Loveknitting - if you make one I'd love to see it!