Tuesday, 8 December 2015

Little Christmas Mouse - free pattern


My next free pattern for Christmas is a slight variation on my Little Kissing Mice pattern, so you can make a cute little mouse with a Christmassy red and green stripy sweater. You can add a loop so you can hang it on your Christmas tree, give it as a sweet little stocking filler, or fill it with catnip as a present for your cat.
 

Abbreviations:
ch = chain
st = stitch or stitches
ss = slipstitch
sc = single crochet (US), double crochet (UK)
dc = double crochet (US), treble crochet (UK)
tog = together
sc2tog = decrease by working two sc together
FLO = work in front loop only
FO = fasten off

Approximate size: 5cm/2" long without tail.

General instructions:
Work in rounds unless otherwise stated and do not join rounds unless told to. Use a stitch marker to mark the start of a round - a small piece of different coloured yarn placed under the stitch at the start of the round will do. To start a round, you can use the magic ring method, but I prefer to ch 2, and work the appropriate number of sc into 1st ch. If you work the sc over the tail of yarn as well you can use that to pull the hole tight.

When changing from one colour of yarn to another work the stitch before the change until there are two loops left on the hook. Then use the new colour for the final yarn over hook and pull through.

Work through both loops of stitches unless otherwise indicated.

You will need:
Small amounts of double knitting or worsted weight yarn:
A natural fur colour for the head and tail.
Two colours of yarn, such as red and green, for the body.
Small amount of black yarn to embroider eyes.
Small length of cotton yarn.
Small amount of stuffing.
3.5mm (E) hook.
Tapestry needle.


Pattern:
 
Start with natural fur colour yarn.
Round 1: Ch 2, work 4 sc into 1st ch - 4 st.
Round 2: [2 sc in next st, sc in next st] 2 times - 6 st.

Round 3: [2 sc in next st, sc in next 2 st] 2 times - 8 st.
Round 4: [2 sc in next st, sc in next 3 st] 2 times - 10 st.
Round 5: Sc in each st around – 10 st.
Round 6: [2 sc in next st, sc in next 4 st] 2 times - 12 st.
Round 7: Sc in next 6 st, [ear, in FLO of next st: ss, ch 2, 5 dc, ch 2, ss], sc in next 3 st, [ear as before], sc in next st – 12 st (counting each ear as one st).
Round 8: Sc in each st around, working into the back loop behind each ear – 12 st.
Stuff head and use black yarn to sew eyes.
Change to first yarn colour for body.
Round 9: [2 sc in next st, sc in next st] 3 times, sc in next 6 st – 15 st.
Round 10: [2 sc in next st, sc in next 4 st] 3 times – 18 st.
Change to second yarn colour for body.
Round 11: Sc in each st around – 18 st.
Change to first yarn colour for body.
Round 12: [Sc in next 2 st, 2 sc in next st, sc in next 3 st] 3 times – 21 st.
Change to second yarn colour for body.
Round 13: Sc in each st around – 21 st.
Change to first yarn colour for body.
Round 14 - 15: (2 rounds) Sc in each st around – 21 st.
Change to natural fur colour yarn.
Round 16: [Sc2tog, sc in next 5 st] 2 times, sc2tog, sc in next 2 st, [tail: ss in next st, ch 20, miss ch next to hook, ss 19, ss back into original st], sc in next 2 st – 18 st.
Round 17: Sc2tog 2 times, sc in next 6 st, sc2tog 4 times – 12 st.
Round 18: Sc2tog 6 times – 6 st.
FO, leaving a length of yarn. Using cotton yarn, sew a loop behind the head if you want to hang your mouse as a decoration. Finish stuffing and sew up bottom of mouse neatly - if you stuff the body well it will sit up nicely.

Another simple idea for a little tree decoration is to make one of my Little Teddies using white yarn and give it a red scarf.


For more Christmas crochet ideas, I also have a Chubby Gnome pattern in my Etsy shop which includes instructions to make these Christmas characters - a cute little Santa and Elf.


If you especially love mice and would like to make some slightly larger ones, try my Wee Mousie pattern.


Keep an eye out here and on my Facebook page as I'll be posting four totally new mini Christmas patterns.

Sunday, 6 December 2015

Star Wars Crochet - yarn used


I've been getting a few requests recently asking about the yarn I used to make the 12 patterns in my Star Wars book, so here are all the details. I live in the UK, so that's where I get all my yarn from. I use double knitting (DK) weight yarn, equivalent to 3:light weight in the US, and 8 ply in Australia/NZ - there's a yarn thickness guide on Ravelry which is very helpful. (By the way, the yarn I used is not the same as the yarn in the kit. That isn't a particular brand, and was sourced by the publisher separately.)

If you can't get hold of the yarns listed below, you can at least look at them in an online store such as Wool Warehouse or LoveCrochet, which might help you find equivalents closer to home.

I used mostly Hayfield Bonus DK, including Black (965) and White (961) for many of the characters. Here's the list of the yarn used for each character individually, not including black and white yarn:

Boba Fett: Hayfield Bonus DK, Orchard (904), Rustic Red (891), Dark Grey Mix (790), Light Grey Mix (814), Pumpkin (766), Robin DK Rust (26) (now unavailable, try Stylecraft Special DK Copper (1029) instead)

C-3PO: Hayfield Bonus DK, wheat (816), Robin Paintbox DK, Leopardskin (197) (possible alternative for gold, Hayfield Bonus DK, Pumpkin (766)) 

Chewbacca: Hayfield DK with wool, brogue (92) for the darker colour, and Hayfield Bonus DK , walnut (927) for the lighter colour. Alternative lighter colour, Robin DK Honey (0129)Bandolier, Hayfield Bonus DK Copper (843) (now unavailable, try Fox (779), or Stylecraft Special DK Copper (1029) instead) and Light Grey Mix (814)

Darth Vader: Hayfield Bonus DK, Light Grey Mix (814), Emerald (916), Signal Red (977) or Classic Red (833), Dark Grey Mix (790)

Wicket the Ewok: Hayfield DK with wool, brogue (92) and Hayfield Bonus DK Copper (843) (now unavailable, try Fox (779), or Stylecraft Special DK Copper (1029) instead) and Oatmeal (964)

Han Solo: Hayfield Bonus DK, Chocolate Brown (947), Biscuit (963), Pine (761), Cream (812), Rustic Red (891) or Classic Red (833)

Jabba the Hutt: Hayfield Bonus DK, orchard (904) and wheat (816)

Luke Skywalker (Jedi): Hayfield Bonus DK, Wheat (816), Biscuit (963), Dark Grey Mix (790), Lightsaber, Bright Green (886) or Robin DK Cordial (162), Light Grey Mix (814)

Princess Leia: Robin DK Brown (051), Hayfield Bonus DK Biscuit (963), Light Grey Mix (814) and Rustic Red (891) or Classic Red (833)

R2-D2: Hayfield Bonus DK, Royal (979), Light Grey Mix (814) or Robin DK Silver (027)

Yoda: (note, the green I used is not available anymore, these are possible alternatives) Robin DK, Lovat (144), Paintbox Yarns simply DK, Slate Green or Hayfield Bonus DK, Grass (825), Hayfield Bonus DK, Chocolate Brown (947), Oatmeal (964) or Hayfield DK with wool, Sand (091)

I know that seems like an awful lot of different yarns, but a lot of them are repeated for different characters, and I used slightly different tones of yarn where you could use the same one if you want to economise, so here are the main colours of yarn you need:

Pale Green for Yoda: Robin DK, Lovat (144)

Green for Jabba and Boba Fett: Hayfield Bonus DK, orchard (904)

Pale skin colour for Leia, Han and Luke: Hayfield Bonus DK, Biscuit (963)

Flaxen gold/blond colour for C-3PO, Jabba's face and Luke's hair: Hayfield Bonus DK, Wheat (816)

Light Brown for Chewbacca: Hayfield Bonus DK, walnut (927)

Brown for Chewbacca and Wicket: Hayfield DK with wool, brogue (92)

Brown for Han's hair and Yoda's body: Hayfield Bonus DK, Chocolate Brown (947)

Dark Brown for Leia's hair: Robin DK Brown (051)
(You could just use the same shade of brown for Han and Leia's hair)

Two shades of grey used for many of the characters, you could just use one of them: Dark Grey Mix (790), Light Grey Mix (814)

Light Beige for Yoda's robe and Wicket's feet: Oatmeal (964) or Hayfield DK with wool, Sand (091)

Rust Brown for Wicket's hood and Chewy's bandolier: Hayfield Bonus DK Copper (843) - similar to Robin DK Rust (26) used for Boba Fett so could use either. (These both seem to be unavailable now, so try Fox (779), or Stylecraft Special DK Copper (1029) instead).

Royal Blue for R2-D2: Hayfield Bonus DK, Royal (979)

Dark Blue for Han's trousers: Hayfield Bonus DK, Pine (761)

Cream for Han's shirt, could substitute white: Hayfield Bonus DK, Cream (812)

Red for Boba Fett's helmet, can be used for side of Han's trousers and Leia's lips: Hayfield Bonus DK, Rustic Red (891)

Then there are a few yarns that you only need a very small amount of, such as the variegated brown yarn for C-3PO's middle (Robin Paintbox DK, Leopardskin (197)), the dark yellow on Boba Fett's costume (Hayfield Bonus DK, Pumpkin (766)), the bright red and greens used for the buttons on Darth Vader and his and Luke's lightsabers.

I hope that list is some help, just ask if you have any questions.

****New information, March 2017****


Now that Star Wars Even More Crochet is out, here are all the yarns I used for the second set of characters (again, not including black and white):


Obi-Wan Kenobi: Hayfield Bonus DK, Silver Grey (838), Biscuit (963), Chocolate Brown (947), Oatmeal (964) or Alpine (942) or Robin DK Oatmeal (035).

Admiral Ackbar: Hayfield Bonus DK, Copper (843) (now unavailable, try Fox (779) instead), Aran (993), Sunflower (978), Silver Grey (838).

Jawa: Hayfield Bonus DK, Chocolate Brown (947) for cloak and Hayfield DK with wool (shade 92, brogue) for feet.

Poe Dameron: Hayfield Bonus DK, Chocolate Brown (947), Oatmeal (964), Dark Grey Mix (790), Light Grey Mix (814), Classic Red (833), Robin DK Cinnamon (131).

BB-8: Hayfield Bonus DK, Silver Grey (838), Bright Orange (981).

Cantina Band: Hayfield Bonus DK, Biscuit (963), Dark Grey Mix (790), Silver Grey (838), Walnut (927).

Lando: Hayfield Bonus DK, Walnut (927), Bluebell (969), Pumpkin (766).

Rey: Hayfield Bonus DK, Chocolate Brown (947), Biscuit (963), Oatmeal (964), Walnut (927), Hayfield DK with wool, brogue (92), Silver Grey (838), Turquoise (998).

Greedo: Hayfield Bonus DK, Duck Egg (723), Spearmint (727), Silver Grey (838), Primrose (957), Robin DK Mustard (136).

Nien Nunb: Hayfield Bonus DK, Biscuit (963), Walnut (927), Robin DK Cinnamon (131).

Finn: Hayfield Bonus DK, Walnut (927), Dark Grey Mix (790), Robin DK Honey (129), Cinnamon (131).

Kylo Ren: Hayfield Bonus DK, Dark Grey Mix (790), Silver Grey (838), Signal Red (977).

*Edited 4th October 2017* I just realised that I didn't add the yarns for Leia in the bikini outfit from Return of the Jedi.

Slave Leia: Robin DK Brown (051), Hayfield Bonus DK Light Grey Mix (814) or Silver Grey (838), Biscuit (963). Skirt: Merlot (835) - now discontinued, possible substitute Claret (841), Cerise (984), Rustic Pink (635) or Robin DK Claret (032). Bikini: yarn I used is no longer available, an alternative that's more gold would be Hayfield Bonus DK Pumpkin (766).

*Edited 22nd May 2016* Adding yarns used for new patterns.

Porg: Hayfield DK with wool (shade 92, brogue), Hayfield Bonus DK, white, Pumpkin (766), Apricot (721).

Jar Jar Binks: Hayfield Bonus DK, Apricot (721), Oatmeal (964), Robin DK Mink (143).

Darth Maul: Hayfield Bonus DK, Classic Red (833), Oatmeal (964), Dark Grey Mix (790), Silver Grey (838).

Ahsoka Tano: Hayfield Bonus DK, Apricot (721) - for alternatives try Burnt Orange (647) or Fox (779). Hayfield Bonus DK, Russet (722) - for alternatives try Chocolate (947) or Claret (841). Hayfield Bonus DK, Light Grey Mix (814), Denim (994), Velvet Plum (906) or Purple (840), Fields of Gold (666).


Saturday, 5 December 2015

Crochet streamer bunting - free pattern


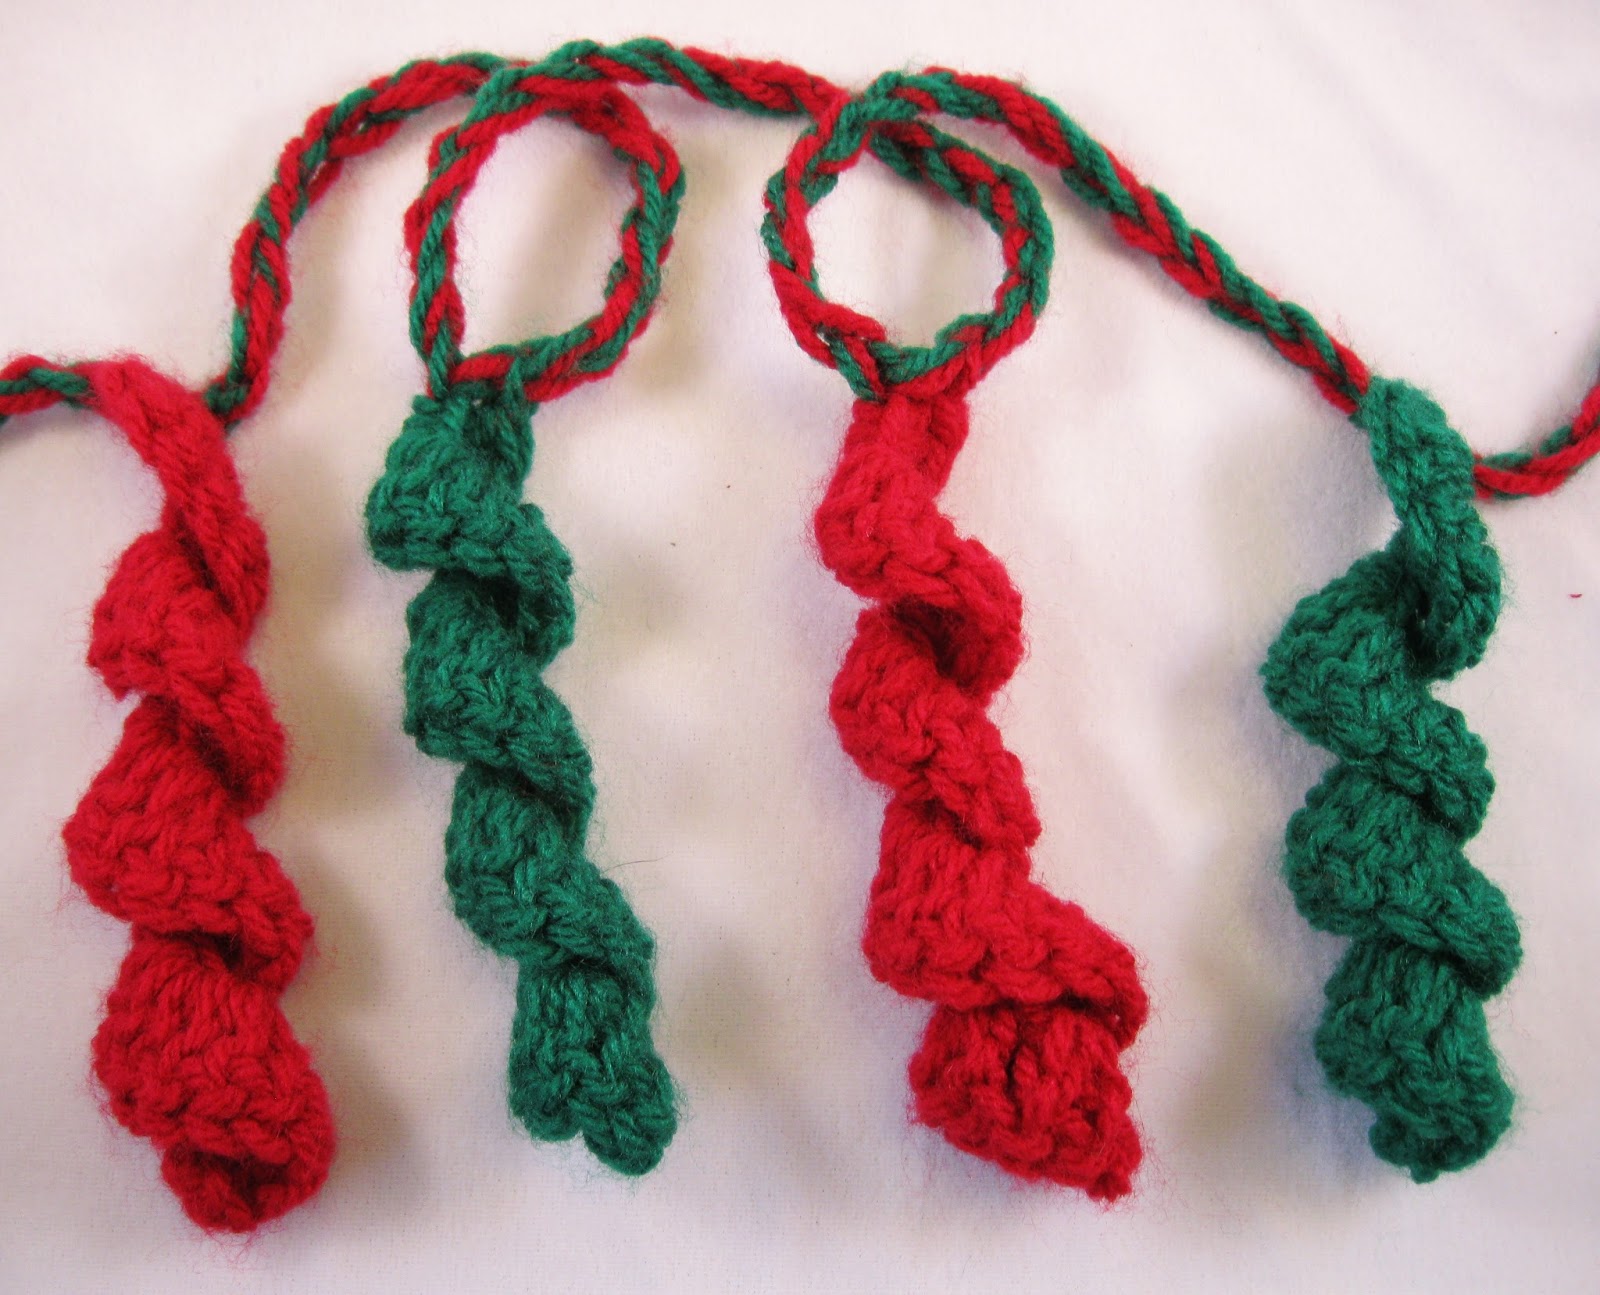
When my children were young and I was decorating the house for Christmas, I was happy with the Christmas tree, but I felt that I needed something up high, to really fill the room. I tried paper streamers, but they always broke and didn't last from year to year. I think I looked for crochet bunting patterns, but they were too complex for the time I had to get something done, involving making lots of small items and then joining them together. So, I came up with this very simple, very quick bunting with streamers hanging from it, in red and green, nice festive colours. You can make it any length you like, change the length of the streamers, and use whatever colours fit in with your Christmas colour scheme. Pale blue and white would give a nice frosty look, especially if you used yarn with a sparkle in it. It's easy to store and it will look great when you bring it out each year.


Crochet Streamer Bunting
 
You will need:
Double knitting weight yarn (cheap acrylic is fine) in two colours. How much you'll need will depend on how long you make it, but 100g ball of each should get you quite a long way.
6mm hook (US J/10)
 
Abbreviations:
ch = chain
dc = double crochet (US), treble crochet (UK)
 
Method:
Work 2 strands together to start.
Ch 48
* Using only 1 strand ch 13, turn.
2 dc in 4th ch from hook, 4 dc in next 9 ch.
Join back into the double strand by working a slipstitch with both strands.
Ch 15 using both strands*
Work from * to *, alternating which colour you use to form the spiral, as many times as necessary to fit your room.
Ch 48, Fasten off.
 
The lengths of chain at the beginning and end are long enough to make loops to go round the end of curtain poles (which is how I secure them), or tie around whatever is handy.


I also made some with shorter streamers (see above), to do that just substitute the instructions below into the main pattern.
* Using only 1 strand ch 10, turn.
2 dc in 4th ch from hook, 4 dc in next 6 ch.

The bunting with the longer streamers is about 17' long, and the one with the shorter streamers is about 31" long. It's a while since I made them, but I think I used about one 100g ball of each colour for each length of bunting.

For another slight variation of this pattern check this post from 2009 when I made a multicoloured version for birthdays: http://lucyravenscar.blogspot.co.uk/2009/06/party-time.html


Thursday, 3 December 2015

Christmas Cracker Crown - free pattern


A few years ago I decided to make my own Christmas crackers (if you’re not familiar with these festive essentials check out the wiki page). I bought a kit with the cardboard tube and the snaps, and bought or made some little gifts to go inside. The kit did come with paper crowns, but I always find these slip off my head, and don’t fit the children in the family (or those with extra large heads), so I decided to make my own. I figured that the easiest way to make crowns that would fit everybody would be to make them very small and attach them with elastic under the chin or behind the head. You could also attach them with hair clips, like a fascinator. Here is the pattern to make your own mini crowns, about 8” in circumference, small enough to fit inside a cracker, or just to be worn for a special get-together or party, at Christmas or any other time. Or, they're just the right size for a dog, if they're patient enough to wear them!


Christmas Cracker Crown

For each crown you will need:
Approx 10g double knitting weight yarn in a bright colour.
Small amount of eyelash yarn in white or contrasting bright colour.
Approx 20” thin elastic.
4mm (F) hook.
Tapestry needle.

Abbreviations:
ch = chain
st = stitch or stitches
ss = slipstitch
sc = single crochet (US), double crochet (UK)
hdc = half double crochet (US), half treble crochet (UK)
dc = double crochet (US), treble crochet (UK)
FO = fasten off

Special stitch instructions:

4 dc bob: bobble stitch. YOH (yarn over hook), insert hook into next stitch, YOH and pull through loop, YOH, pull through 2 loops, *YOH, insert hook into same stitch, YOH and pull through loop, YOH, pull through 2 loops, repeat twice from*, YOH, pull through all 5 loops on hook.

Front post sc (Fpsc): work stitch (sc) by putting your hook from right to left around the back of the post of the next stitch on the previous round. This will create a ridge on the other side of your work.

The front post stitches help the crown keep its circular shape, but if you want it to be stiffer you can use a pipe cleaner. Work round 1 with single crochet over a pipe cleaner, preferably the same colour as the main yarn.


Pattern:
Using main yarn for crown, ch 41, sc into 2nd ch from hook, sc into next 39 ch. Making sure not to twist it, join to the first sc with a ss to make a circle.
Round 1: Ch 1, fpsc around same st, fpsc around next 39 st, ss to join to 1st st.
Round 2: Ch 2 (counts as 1 hdc), hdc in next 39 st, ss to join to 1st st.
Round 3: Ch 1, fpsc around same st, fpsc around next 39 st, ss to join to 1st st.
Round 4: Starting in next st of round after joining ss [sc, skip 2 st, 3 dc in next st, ch 2, 3 dc in same st, skip 2 st, sc, ss] 5 times.
Round 5: Ss in each st around, 4 dc bob into each ch 2 gap. FO.

Push the bobble stitches from the inside outwards. Turn crown inside out and join in eyelash yarn into back of original ch, sc around bottom into back of original ch and join to first sc with ss. FO

Sew together the point where you originally joined in a circle and weave in ends. Tie or sew a length of thin elastic on either side so it will stay on head.


Note: sorry about the quality of these photos. The light is awful at this time of year, and I had to bribe my son to use his head to model the crowns, but he refused to let me show his face. Boris, our dog, was also bribed with a treat, but you can see how thrilled he was to be modelling!


Tuesday, 1 December 2015

Christmas is on the way! Mini Santa hat free pattern


I'm not a great one for preparing for Christmas too early, but when it gets to the 1st of December I start to feel more seasonal. To celebrate, I'm going to be posting a few simple, free crochet patterns over the next few days. They'll all be quick and easy to make, and could be useful for a few Christmas extras, for decoration, adding to your gift wrapping, or for mini presents.

Last year I made my crochet Daleks a bit more festive by making them mini Santa hats, so here’s the pattern so you can use it for your Daleks (pattern here), or other small toys. It will also fit figures made from my Halfling, Elf and Dwarf patterns.

If you use double knitting weight yarn the hat will have a circumference of about 21cm/8”. If you’ve made a Dalek or figure using a thicker yarn, use that same thickness of yarn for the hat so it will fit.

Abbreviations:
ch = chain
st = stitch or stitches
sc = single crochet (US), double crochet (UK)
FO = fasten off

General instructions:
Work in rounds and through both loops of stitches. Use a stitch marker to mark the start of a round - a small piece of different coloured yarn placed under the stitch at the start of the round will do. To start the first round, you can use the magic ring method, but I prefer (ch 2, work 6 sc into 1st ch). If you work the 6 sc over the tail of yarn as well you can use that to pull the hole tight.

You will need:
Approx 10 – 15g red yarn, double knitting weight.
Small amount of white yarn, double knitting weight.
(Optional: use fuzzy white yarn for the edge, you will still need ordinary yarn for the bobble.)
3.5mm (E) hook.
Tapestry needle.
Fork with four tines.

Hat:
Start using red yarn.
Round 1: Ch 2, work 6 sc into 1st ch – 6 st.
Round 2: Sc in each st around – 6 st.
Round 3: [2 sc in next st, sc in next 2 st] 2 times – 8 st.
Round 4: [2 sc in next st, sc in next 3 st] 2 times – 10 st.
Round 5: [2 sc in next st, sc in next 4 st] 2 times – 12 st.
Round 6: [2 sc in next st, sc in next 5 st] 2 times – 14 st.
Round 7: [2 sc in next st, sc in next 6 st] 2 times – 16 st.
Round 8: [2 sc in next st, sc in next 7 st] 2 times – 18 st.
Round 9: [2 sc in next st, sc in next 5 st] 3 times – 21 st.

Round 10: Sc in each st around – 21 st.
Round 11: [2 sc in next st, sc in next 6 st] 3 times – 24 st.
Round 12: Sc in each st around – 24 st.
Round 13: [2 sc in next st, sc in next 7 st] 3 times – 27 st.
Round 14: Sc in each st around – 27 st.
Round 15: [2 sc in next st, sc in next 8 st] 3 times – 30 st.
Round 16: Sc in each st around – 30 st.
Round 17: [2 sc in next st, sc in next 9 st] 3 times – 33 st.
Round 18: Sc in each st around – 33 st.
Round 19: [2 sc in next st, sc in next 10 st] 3 times – 36 st.
Round 20: Sc in each st around – 36 st.
Round 21: [2 sc in next st, sc in next 11 st] 3 times – 39 st.
Round 22: Sc in each st around – 39 st.
Round 23: [2 sc in next st, sc in next 12 st] 3 times – 42 st.
Round 24: Sc in each st around – 42 st.
Change to white or white fuzzy yarn.
Round 25 - 26: Sc in each st around – 42 st.
FO and weave in ends.

Bobble:
Using white yarn make a tiny pompom by wrapping the yarn around a fork about 12 times. Cut yarn and then tie another length of white yarn around the middle with a double knot. Remove from fork and cut the loops in the pompom and trim neatly to the right size for the hat. Sew the length of yarn through the middle of the pompom a few times to secure it, then sew to the point of the hat.

If you like, fold the point of the hat over and sew in place with a couple of stitches (use the red yarn from where you started making the hat).

If you want to hat to fit something slightly smaller or larger, just stop when it’s large enough, or keep increasing in the same way until it’s large enough.

Monday, 30 November 2015

Star Wars Crochet in Spanish

I've recently been sent a copy of my Star Wars Crochet book that has now been published in Spanish. I can't speak Spanish myself, but here are all the details on the publisher's website.


Mi libro Star Wars ganchillo está ahora disponible en español. Todos los detalles aquí en el sitio web de la editorial: http://www.planetadelibros.com/kit-star-wars-crochet-libro-201117.html

Wednesday, 21 October 2015

Yeti and Bigfoot Amigurumi Pattern


When I first started designing patterns I often made things using fuzzy mohair type yarn, which I then brushed to make cute, furry creatures, including my Adorable Monsters. Unfortunately, mohair yarns have become a lot less fashionable since then, and you can often only find very lightweight ones, which are no good for making amigurumi at a reasonable size. I did make some Adorable Monsters using normal yarn, but I decided to have another go, and make a little Yeti and Bigfoot.

I still wanted to give their fur a bit of texture, so this time I used Stylecraft Alpaca DK, an acrylic yarn with 20% alpaca in the mix. I find it works well for amigurumi animals as it has a really nice, soft and furry feel to it - I used it for my Alpaca Family and Bracken the Fox.

I made a little Bigfoot, tweaking the pattern slightly to give it a thumb, and I was really happy with the way it looked. I then thought it would be nice to have a larger version, something it would be a bit easier to cuddle. If you want to make a larger version of an amigurumi, there isn't any formula to do it. You just have to work your way through it, with an idea of what you want it to look like, and use trial and error to get it right. And some things don't scale up easily - it took a while to work out how to make the bigger fingers and toes when the popcorn stitches I used were just the right size for the original. I decided to make the big version with proportionally longer legs, but otherwise they're very similar.


Once I was happy with both the patterns, I made a pair of Yeti to go with the Bigfoots (Bigfeet?). As I was making the little one, I decided to see what the feet would look like sewn to the front, so it's sitting down, and I thought it looked really cute. The standing version of the little Bigfoot is only 6 inches tall, so the little sitting Yeti fits in your hand rather nicely. The bigger versions are 9 inches tall, and definitely just right for a cuddle.


So, if you'd like to make yourself a cute monster family, you can get the pattern from Etsy or Ravelry. I think they're cute on their own, but even cuter together.