Showing posts with label sweet. Show all posts

Tuesday, 16 April 2013

Mini Frog - Free Amigurumi Pattern


Here's another one of the patterns I've made in the past for my children's school Christmas bazaar. However, a bright green frog seems more of a spring thing to me, so now is the perfect time to make one. This friendly little frog is easy to make with no parts to sew on, and is just 1.5"/4 cm tall. 


Abbreviations:
ch = chain
st = stitch or stitches
sc = single crochet (US), double crochet (UK)
dc = double crochet (US), treble crochet (UK)
hdc = half double crochet (US), half treble crochet (UK)
BLO = back loop only
FLO = front loop only
tog = together
sc2tog = decrease by working two sc together
bob = bobble (see special stitch instructions)
pop = popcorn (see special stitch instructions)
FO = fasten off

General instructions:
Work in rounds unless otherwise stated and do not join rounds unless told to. Use a stitch marker to mark the start of a round - a small piece of different coloured yarn placed under the stitch at the start of the round will do. To start a round, you can use the magic ring method, but I prefer (ch2, work 6 sc into 1st ch). If you work the 6 sc over the tail of yarn as well you can use that to pull the hole tight.

Work through both loops of stitches unless otherwise indicated.

Special stitch instructions:
4 dc pop: popcorn stitch for eyes and feet. Work 4 dc into 1 st, take hook out leaving loop, put hook through 1st dc & pull loop through.

3 dc bob: bobble stitch for hands. YOH (yarn over hook), insert hook into next stitch, YOH and pull through loop, YOH, pull through 2 loops, *YOH, insert hook into same stitch, YOH and pull through loop, YOH, pull through 2 loops, repeat once from*, YOH, pull through all 4 loops on hook.

You will need:
Small amount of green yarn, double knitting or worsted weight.
Small amount of red yarn for the mouth.
Small of black yarn for the eyes.
Small amount of stuffing.
3.5mm (E) hook.
 
Round 1: Ch 2, work 6 sc into 1st ch - 6 st.
Round 2: 2 sc in each st around - 12 st.
Round 3: [2 sc in next st, sc in next st, 2 sc in next st, 4dc pop in next st, 2 sc in next st, sc in next st] 2 times – 18 st.
Round 4 - 6: (3 rounds) Sc in each st around - 18 st.
Round 7: [Sc2tog, sc in next st] 6 times – 12 st.
Round 8: Sc in next 4 st, [arm: ss into next st, ch 6, 3dc bob into 3rd ch from hook, ss into next 3 ch, ss back into original st], sc in next 5 st, [arm], sc in next st - 12 st.
Round 9 - 10: (2 rounds) Sc in each st around - 12 st.
Round 11: [2 sc in next st, sc in next 3 st] 3 times – 15 st.
Round 12: Sc in each st around - 15 st.
Round 13: Sc in next 8 st, 4dc pop, sc in next 4 st, 4dc pop, sc in next st - 15 st.
Round 14: [Sc2tog, sc in next 3 st] 3 times – 12 st.
Round 15: [Sc2tog] 6 times – 6 sc. FO, leaving a length of yarn.

Stuff head and body. Embroider black eyes on the popcorn stitches on the head and use the red yarn to sew a wide mouth. Use length of yarn to sew up hole at bottom.

Monday, 15 April 2013

Mini Monkeys - Free Amigurumi Pattern


If you've been following my blog you'll know that every year I make lots of little amigurumi for our school's Christmas Bazaar. I've been gradually putting the patterns on here, but I've still got quite a few to go.
 
 
I've made mini monkeys over several years, and tried all sorts of variations of the pattern, but this is the one I'm happiest with. You can make these little monkeys in two ways: either follow the main pattern to give them long legs or use the alternative instructions to have them sitting down with their little feet sticking out. Either way they're about 2"/5.5mm tall, not including legs. Make them in natural browns like mine or use any colour you like.

Abbreviations:
ch = chain
st = stitch or stitches
sc = single crochet (US), double crochet (UK)
dc = double crochet (US), treble crochet (UK)
hdc = half double crochet (US), half treble crochet (UK)
BLO = back loop only
FLO = front loop only
tog = together
sc2tog = decrease by working two sc together
bob = bobble (see special stitch instructions)
pop = popcorn (see special stitch instructions)
FO = fasten off

General instructions:
Work in rounds unless otherwise stated and do not join rounds unless told to. Use a stitch marker to mark the start of a round - a small piece of different coloured yarn placed under the stitch at the start of the round will do. To start a round, you can use the magic ring method, but I prefer (ch2, work 6 sc into 1st ch). If you work the 6 sc over the tail of yarn as well you can use that to pull the hole tight.

Work through both loops of stitches unless otherwise indicated.

The faces for these monkeys are made by changing the yarn colour as you crochet. Carry the body colour yarn under the face colour by crocheting over it every couple of stitches. Don't carry the face yarn under the body yarn, just leave it hanging and pick it up when you need it in the next round.

Special stitch instructions:
4 dc pop: popcorn stitch for ears and alternative feet. Work 4 dc into 1 st, take hook out leaving loop, put hook through 1st dc & pull loop through.

3 dc bob: bobble stitch for face, hands and feet. YOH (yarn over hook), insert hook into next stitch, YOH and pull through loop, YOH, pull through 2 loops, *YOH, insert hook into same stitch, YOH and pull through loop, YOH, pull through 2 loops, repeat once from*, YOH, pull through all 4 loops on hook.

You will need:
Small amount of double knitting or worsted weight yarn for the body of your monkey, any colour you like.
Small amount of double knitting or worsted weight yarn for the face of your monkey, pale brown or any colour you like.
Small of black yarn for eyes and mouth.
Small amount of stuffing.
3.5mm (E) hook.


Start with yarn for body.
Round 1: Ch 2, work 6 sc into 1st ch - 6 st.
Round 2: 2 sc in each st around - 12 st.
Round 3: [2 sc in next st, sc in next st] 6 times – 18 st.

Round 4: Sc in each st around - 18 st.
Round 5: Sc in next 6 st, change to face yarn, sc in next 5 st, change to body yarn, sc in next 7 st – 18 st.
Round 6: Sc in next 4 st, 4dc pop in next st, sc in next st, change to face yarn, sc in next 5 st, change to body yarn, sc in next 2 st, 4dc pop in next st, sc in next 4 st – 18 st.
Round 7: Sc in next 7 st, change to face yarn, 3dc bob in next 4 st, change to body yarn, sc in next 7 st – 18 st.
Round 8: [Sc2tog, sc in next st] 6 times – 12 st.
Round 9: [Sc2tog, sc in next 2 st] 3 times – 9 st.
Round 10: [2 sc in next st, sc in next 2 st] 3 times – 12 st.
Round 11: Sc in next 4 st, [arm: ss into next st, ch 7, 3dc bob into 3rd ch from hook, ss into next 4 ch, ss back into original st], sc in next 4 st, [arm], sc in next 2 st - 12 st.
Round 12 - 15: (4 rounds) Sc in each st around - 12 st.
Round 16: Sc in next 5 st ,[leg: make as arm], sc in next 4 st, [leg], sc in next st - 12 st.
Round 17: Sc in next 2 st, [tail: ss into next st, ch 13, miss ch next to hook, ss into next 12 ch, ss back into original st], sc in next 9 st - 12 st.
Round 18: [Sc2tog] 6 times – 6 sc. FO, leaving a length of yarn.

Stuff head and body. Push the bobbles on the face outwards and embroider eyes and mouth using black yarn. Use length of yarn to sew up hole at bottom.


Alternative sitting monkey
Make as above up to round 14.
Round 15: [2 sc in next st, sc in next 3 st] 3 times – 15 st.
Round 16: Sc in next 8 st, 4dc pop, sc in next 3 st, 4dc pop, sc in next 2 st - 15 st.
Round 17: Sc in next 3 st, [tail: ss into next st, ch 13, miss ch next to hook, ss into next 12 ch, ss back into original st], sc in next 11 st - 15 st.
Round 18: [Sc2tog, sc in next 3 st] 3 times – 12 st.
Round 19: [Sc2tog] 6 times – 6 sc. FO, leaving a length of yarn.

Finish off as above.
 
Keep watching this space, I'll put up a pattern for a mini frog tomorrow.


Saturday, 13 April 2013

Boris The Tiny Lion - Free Amigurumi Pattern

I've posted about this pattern before, it was part of a pattern exchange here, but I thought I'd put the pattern here on my blog so it's easy to find.

Boris The Tiny Lion 
Amigurumi Pattern

 
Abbreviations:
ch = chain
st = stitch or stitches
sc = single crochet (US), double crochet (UK)
dc = double crochet (US), treble crochet (UK)
hdc = half double crochet (US), half treble crochet (UK)
BLO = back loop only
FLO = front loop only
tog = together
sc2tog = decrease by working two sc together
FO = fasten off

General instructions:
Work in rounds unless otherwise stated and do not join rounds unless told to. Use a stitch marker to mark the start of a round - a small piece of different coloured yarn placed under the stitch at the start of the round will do. To start a round, you can use the magic ring method, but I prefer (ch2, work 6 sc into 1st ch). If you work the 6 sc over the tail of yarn as well you can use that to pull the hole tight.

Work through both loops of stitches unless otherwise indicated.

You will need:
Small amount of yellow/gold yarn.
Small amount of brown yarn.
Small amount of black yarn.
Small amount of stuffing.
3.5mm (E) hook.

Special stitch instructions:
5 dc pop: popcorn stitch for legs. Work 5 dc into 1 st, take hook out leaving loop, put hook through 1st dc & pull loop through.

3 dc bob: bobble stitch for mane. YOH, insert hook into next stitch, YOH and pull through stitch, YOH, pull through 2 loops, *YOH, insert hook into same stitch, YOH and pull through stitch, YOH, pull through 2 loops, repeat from*, YOH, pull through all 4 loops on hook.

Body:
Start using yellow/gold yarn.
Round 1: Ch 2, work 6 sc into 1st ch - 6 st.
Round 2: [2 sc in next st, sc in next st] 3 times – 9 st.

Round 3: Sc in each st around - 9 st.
Round 4: [2 sc in next st, sc in next 2 st] 3 times – 12 st.
Round 5: [2 sc in next st, sc in next st] 6 times – 18 st.
Round 6: Sc in each st around - 18 st.
Change to brown yarn.
Round 7: [Sc in next st, 3 dc bob in next st] 9 times – 18 st.
(Push the bobbles outwards after each round.)
Round 8: Sc in next st, [sc in next st, 3 dc bob in next st] 8 times, sc in next st – 18 st. (Optional: to make ears do the 2nd and 5th bobbles in the yellow/gold yarn).
Round 9: [Sc in next st, 3 dc bob in next st] 9 times – 18 st.
Change to yellow/gold yarn.
Round 10: [2 sc in next st] 2 times, sc in next 12 st, [2 sc in next st] 4 times – 24 st.
Round 11: 5 dc pop in next st, sc in next 19 st, 5 dc pop in next st, sc in next 3 st – 24 st.
Round 12: Sc2tog, sc in next 18 st, [sc2tog] 2 times – 21 st.
Round 13 - 15: (3 rounds) Sc in each st around - 21 st.

Stuff as far as you can and embroider face with black yarn. Use French knots to make eyes.


Round 16: Sc in next st, 5 dc pop in next st, sc in next 16 st, 5 dc pop in next st, sc in next 2 st – 21 st.
Round 17: Sc in each st around - 21 st.
Round 18: [Sc2tog, sc in next 5 st] 3 times – 18 st.
Round 19: [Sc2tog, sc in next st] 6 times – 12 st.
Round 20: [Sc2tog] 6 times – 6 st.
FO, leaving length of yarn. Finish stuffing and sew up hole at end.

Tail:
Ch 5, turn, miss ch next to hook, ss in next 4 ch.
FO and sew to bottom. Sew or knot a little bit of brown yarn to the end to make a tuft.


Tuesday, 2 April 2013

Wee Mousies

 
My Wee Mousie pattern, which has been published in Inside Crochet and their 'bookazine' The Complete Guide To Crochet, is now available in my Etsy shop


I was very much inspired by my childhood when I made these - I loved tiny toys, but I wasn't very keen on dolls, I much preferred animals to play with, and reading things like Beatrix Potter and watching Bagpuss added to that.


The pattern has all the details to make either a little girl mouse with a dress, or a little boy mouse in a sweater. They're pretty much mouse-sized, just 9 cm (3.5") tall, so they're perfect as a little friend to carry around, or to play with in a doll's house. I can just imagine making them a home out of a shoebox, with furniture made from matchboxes and cotton reels, a bit like the Borrowers. Oh, and I'm sure they'd need a bed with a tiny crocheted blanket!

Saturday, 8 December 2012

My Pet Caterpillar or Worm


It's that time of year again when I've been busy making lots of tiny things for the Christmas Bazaar at my son's school. These little caterpillars (which can be fuzzy or not as you choose) or worms, are very quick to make, they don't even need stuffing. I think it's cute to put them in little matchboxes, so they look like something that a kid would pick up in the garden.


My Pet Caterpillar or Worm
Use whatever colour yarn you want your worm or caterpillar to be. If you want your caterpillar to be fuzzy, you’ll need a little bit of eyelash yarn. You’ll also need some black yarn to make the face. 4mm hook.
Abbreviations:
ch = chain
st = stitch or stitches
sc = single crochet (US), double crochet (UK)
dc = double crochet (US), treble crochet (UK)

Special stitch instructions:

3 dc bobble: YOH (yarn over hook), insert hook into second ch from hook, YOH and pull through loop, YOH, pull through 2 loops, *YOH, insert hook into same stitch, YOH and pull through loop, YOH, pull through 2 loops, repeat once from*, YOH, pull through all 4 loops on hook.
 
2 dc bobble: YOH (yarn over hook), insert hook into next stitch, YOH and pull through loop, YOH, pull through 2 loops, YOH, insert hook into same stitch, YOH and pull through loop, YOH, pull through 2 loops, YOH, pull through all 3 loops on hook.

Ch 13, turn.
Miss 1st 2 ch and do 3 dc bobble into 3rd ch, (sc in next ch, 2 dc bobble in next ch) 4 times, sc in next 2 ch, ch 1, turn.
Sc in next 11 st, ch 2, turn.
3 dc bobble in next st, (sc in next ch, 2 dc bobble in next ch) 4 times, sc in next 2 ch, (change to eyelash yarn here if you’re using it) ch 1, turn.

Join the edges with slipstitch, putting the hook through back loop of current row and the other side of the original chain. Make sure you put the original tail of yarn in the inside as you join, you’ll need it to make an antenna. (Keep the start of the fuzzy yarn inside too, it’ll save tidying it up later). Finish off, leaving enough yarn to make the other antenna. This is the head. If it’s a caterpillar, the joined side is the top (I think the bobbles look like stumpy legs at the bottom), the other way up for a worm, so take that into account when you sew on the features. There is an open part at the front of the head, so tie a knot in the black yarn and sew it through from the inside to make an eye. Leave the black yarn hanging and use one of the ends to sew up the front of the head, then make an antenna by sewing once in the same place, tying a knot where you want the end of the antenna to be, and cutting off any excess. Do the same with the other end for the other antenna. Finish off sewing the features, another eye & a mouth (the creature is so small it doesn’t have to be very detailed), take the black yarn through the body & cut off.  You can also glue on small googly eyes instead of sewing features.

Saturday, 27 October 2012

Wee Mousies in Inside Crochet!

The latest copy of Inside Crochet has just come out (issue 35) and my pattern to make a pair of cute little mice is in it!

These Wee Mousies are only 9cm tall so they're perfect to make for little presents or stocking fillers. They'll fit perfectly in a pocket and it would be sweet to make them a little bed out of a box, and crochet a tiny blanket for them. Their clothes are crocheted as part of their bodies, but you could easily make them little accessories - my prototype has no clothes but he does have a scarf.


If you like to crochet you should check out Inside Crochet, it's always full of gorgeous patterns; clothes that I'm dying to make but will probably never get the time - there's a Ruby Sweater this month that has an amazing texture - and smaller projects that I really want to try. The Milly, Molly, Mandy scarf on the front cover looks delicious and there are some beautful, understated scatter cushions that I fancy giving a go. There are also some great inspirational articles and a 'how to' section that's useful if you're new to crochet.

Tuesday, 18 September 2012

Woolly Monkeys

I've been working on all sorts of things over the summer, but not getting many of them finished. Now the children are back at school I'm finally getting on top of everything again, so I'll probably do several posts in quick succession.

 
I started on these monkeys a few months ago, trying to refine a design I came up with back in 2009 (Fuzzy Monkey). I made that with a fuzzy yarn that isn't always easy to get hold of, so I wanted to make the design workable in both smooth and fuzzy, mohair style yarns. For the smooth ones I used a nice yarn that had a bit of texture and a mix of colours to give a bit of extra interest (James C Brett Marble), and I found a nice variegated mohair yarn for the fuzzy ones (King Cole Luxury Mohair).


I tried to keep the design nice and simple, without any detail in the faces. I experimented with embroidered features but it just didn't work. With no particular expression you can imagine they are looking however you want - sometimes they look cheeky, or confident, or friendly, or sometimes a little sad.


Woolly Monkeys are a real species of monkey, but my Woolly Monkeys are a lot more bright, and the stripy tails are just for fun. They are made out of wool (or acrylic that looks woolly!) though, so it seemed a good name.


The pattern is available to buy from my Etsy shop  or on Ravelry.

Sunday, 8 April 2012

Mini Crochet Creatures - Tiny Two-tone Turtle


These tiny turtles are great to use up scraps of yarn, and can easily be made as keychains. Using two colours and spike stitch makes a really pretty design on the shell. Why not make lots of them! For general instructions and abbreviations, please check this earlier post

Tiny Two-tone Turtle


You will need:
Small amounts of yarn: two colours for the shell (C1 and C2) and light brown for the body.
Black yarn for eyes and mouth.
Small amount of stuffing.
Small split ring approx 1" (2cm) diameter.
3.5mm (E) hook.

Special stitch instructions:
3 dc pop: popcorn stitch for legs. Work 3 dc into 1 st, take hook out leaving loop, put hook through 1st dc & pull loop through.

Spike stitch (spike st): instead of working the sc into the top of the stitch in the previous round, work it right over that stitch and into the stitch from the round before.

Start using C1.
Round 1: Ch 2, work 6 sc into 1st ch - 6 st.
Round 2: 2 sc in each st around - 12 st.

Change to C2.
Round 3: [2 sc in next st, spike st over next st] 6 times – 18 st.

Round 4: [2 sc in next st, sc in next 5 st] 3 times – 21 st.
Change to C1.
Round 5: [Sc in next 2 st, spike st over next st] 7 times - 21 st.
Change to light brown yarn.
Round 6: Work in BLO for whole round: Sc in next 2 st, (*tail: ss in next st, ch 2, ss in 2nd ch from hook, ss back into original st), sc in next 2 st, 3 dc pop in next st, sc in next 3 st, 3 dc pop in next st, sc in next 2 st, [head: 3 dc in each of next 2 st, take hook out leaving loop, put hook through 1st dc & pull loop through], sc in next 2 st, 3 dc pop in next st, sc in next 3 st, 3 dc pop in next st - 20 st.
Round 7: Sc in each st around - 20 st.
Round 8: [Sc2tog] 10 times – 10 st.
Round 9: [Sc2tog] 5 times – 5 st. FO, leaving a length of yarn.

(*To make tail with split ring attached: ss in next st, ch 3, put split ring onto hook, ss over split ring in 2nd ch from hook and pull split ring over the end of the hook. Ss into next ch, ss back into original st.) Continue with round 6.

Use black yarn to sew eyes and a tiny mouth on the turtle's head, stuff and use length of brown yarn to sew up hole at bottom.

Mini Crochet Creatures - Baby Octopuses

Using any colour of yarn you like, make these cute baby octopuses. Choose between one with long wiggly legs, or one with short stubby little legs. For general instructions and abbreviations, please check the previous post.


Baby Octopuses

You will need:
Small amount of yarn, any colour you like.
Small safety eyes, buttons, or yarn for eyes.
Small amount of stuffing.
3.5mm (E) hook.

Special stitch instructions:
6 dc pop: popcorn stitch for short legs. Work 6 dc into 1 st, take hook out leaving loop, put hook through 1st dc & pull loop through.

Round 1: Ch 2, work 6 sc into 1st ch - 6 st.
Round 2: 2 sc in each st around - 12 st.
Round 3: [2 sc in next st, sc in next st] 6 times – 18 st.

Round 4: [2 sc in next st, sc in next 2 st] 6 times – 24 st.
Round 5 - 8: (4 rounds) Sc in each st around - 24 st.
Round 9: [Sc2tog, sc in next st] 8 times – 16 st.

To make an octopus with long legs, follow the rest of the instructions for rounds 10 to 13 here:

Round 10: Work in FLO for whole round [Ss into next st, ch 9, miss ch next to hook, sc into next 8 ch, ss back into original st, sc into next st] 8 times - 16 st.

Fit eyes now if using safety eyes, and start to stuff.

Round 11: Sc in each of the back loops left from the previous round - 16 st.
Round 12: [Sc2tog, sc in next 2 sc] 4 times – 12 sc.
Round 13: [Sc2tog] 6 times – 6 sc. FO, leaving a length of yarn.

To make an octopus with short legs, follow the rest of the instructions for rounds 10 to 12 here:

Round 10: [6 dc pop in next st, sc in next st] 8 times - 16 st.

Fit eyes now if using safety eyes, and start to stuff.

Round 11: [Sc2tog, sc in next 2 st] 4 times – 12 st.
Round 12: [Sc2tog] 6 times – 6 st. FO, leaving a length of yarn.

Both variations: Finish stuffing. If you aren't using safety eyes, sew on or embroider eyes now. Use length of yarn to sew up hole at bottom.

Mini Crochet Creatures - Wee Sheepie


Happy Easter! I've just written up a few patterns to make some tiny little crochet animals - a little sheep, a tiny turtle, and two versions of a baby octopus. Below are a list of abbreviations and some general instructions that will help with all the patterns, and then the pattern to make a Wee Sheepie. I'll put the patterns for the other animals in the following posts.

Abbreviations:
ch = chain
st = stitch or stitches
sc = single crochet (US), double crochet (UK)
dc = double crochet (US), treble crochet (UK)
hdc = half double crochet (US), half treble crochet (UK)
BLO = back loop only
FLO = front loop only
tog = together
sc2tog = decrease by working two sc together
FO = fasten off

General instructions:
Work in rounds unless otherwise stated and do not join rounds unless told to. Use a stitch marker to mark the start of a round - a small piece of different coloured yarn placed under the stitch at the start of the round will do. To start a round, you can use the magic ring method, but I prefer (ch2, work 6 sc into 1st ch). If you work the 6 sc over the tail of yarn as well you can use that to pull the hole tight.

Work through both loops of stitches unless otherwise indicated.

 
Wee Sheepie

You will need:
Small amount of cream yarn.
Small amount of black yarn.
Small amount of stuffing.
3.5mm (E) hook.
Special stitch instructions:
4 dc pop: popcorn stitch for ears and legs. Work 4 dc into 1 st, take hook out leaving loop, put hook through 1st dc & pull loop through.
Start using black yarn.
Round 1: Ch 2, work 6 sc into 1st ch - 6 st.
Round 2: [2 sc in next st, sc in next st] 3 times – 9 st.
Round 3: [2 sc in next st, sc in next 2 st] 3 times – 12 st.
Round 4: Sc in each st around - 12 st.
Round 5: Sc in next 4 st, 4 dc pop in next st, sc in next 3 st, 4 dc pop in next st, sc in next 3 st – 12 st.
Round 6: [Sc2tog, sc in next 2 st] 3 times – 9 st.
Change to cream yarn.
Round 7: 2 sc in each st around - 18 st.
Round 8: Sc in each st around - 18 st.
Change to black yarn.
Round 9: 4 dc pop in next st, (change to cream yarn) sc in next 2 st, (black) 4 dc pop in next st, (cream) sc in next 14 st – 18 st.
Round 10 - 11: (2 rounds) Sc in each st around - 18 st.
Round 12: Sc in next st, (black) 4 dc pop in next st, (cream) sc in next 2 st, (black) 4 dc pop in next st, (cream) sc in next 13 st – 18 st.
Round 13: Sc in each st around - 18 st.
Round 14: [Sc2tog, sc in next st] 6 times – 12 st.
Round 15: [Sc2tog] 6 times – 6 st.
FO, leaving lengths of black and cream yarn.
Embroider the eyes making patches using cream yarn with a dot of black yarn on top. Stuff and use length of cream yarn to sew up hole at bottom.


Thursday, 8 September 2011

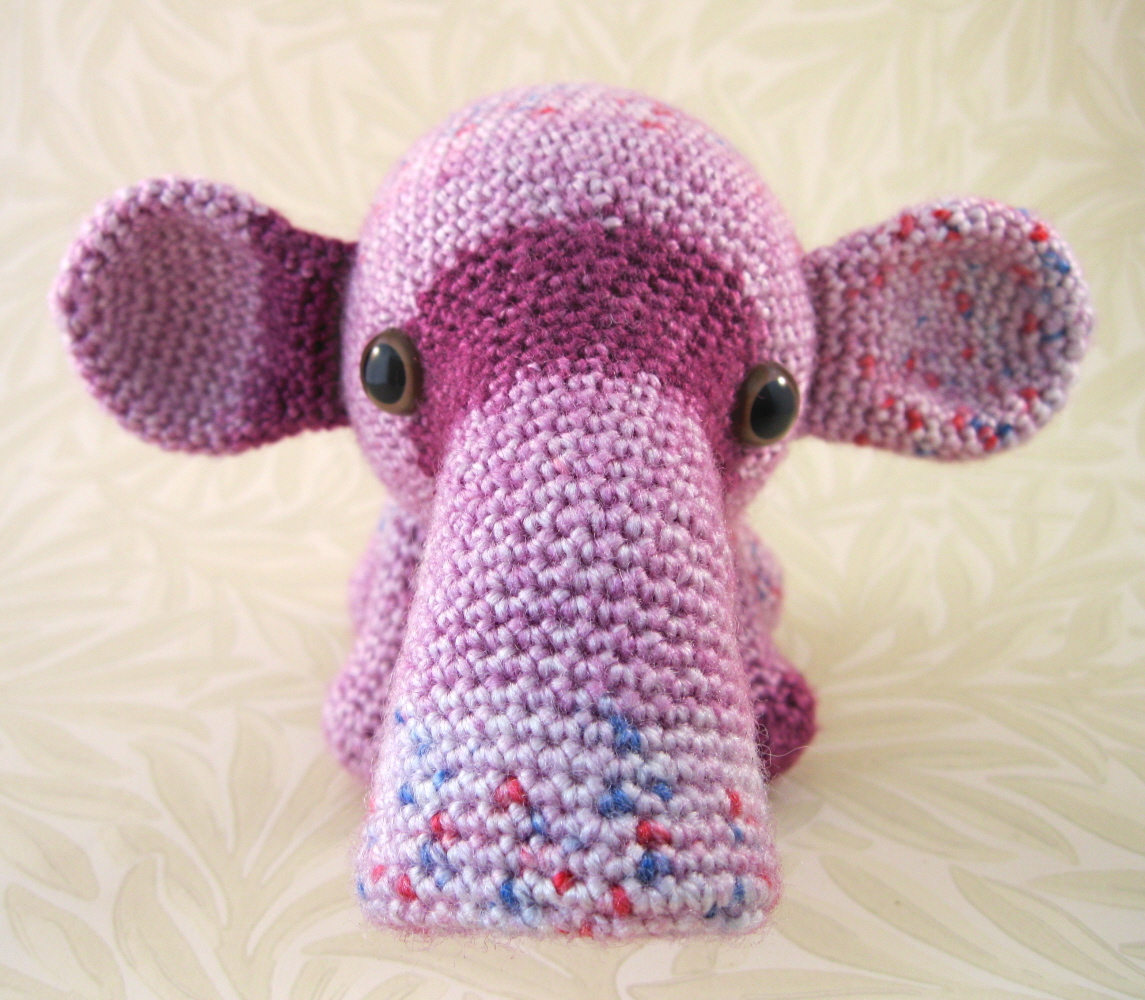
A Tower of Tooterphants!


Tooterphants are friendly little creatures, similar in shape to elephants, if not in size. However, they have wide trumpet-shaped trunks that they use to make tooting noises to communicate with one another. They also use their trunks, or tooters, to suck up their food - should you want to attract one, leave a trail of interesting treats such as raisins and they may follow it. They live in groups, and enjoy acrobatic games where they climb on top of each other to form a tower of Tooterphants - luckily their rounded shape makes them bouncy, so they don't mind when they fall down.


These cute creatures are based on patterns I'd made in the past - several years ago I made an Eater of Socks for a swap, based on the description of a creature that appears briefly in Terry Pratchett's Hogfather. Given that it eats odd socks, I gave it a wide trunk/snout to suck them up, and made its legs striped like socks to act as camouflage. Then, a few years later, I made a Sky Elephant, using the previous pattern as a base, but making it bigger. The Sky Elephant was made from blue and white variegated yarn and had fluffly cloud-like ears.


So, I went back and revisited these patterns. I had some nice self-striping yarn that I wanted to try out (King Cole Splash DK), and I thought these would be the perfect patterns to use to show off all the colours nicely. I made a few minor changes, but I liked the patterns pretty much as they were. They have a nice compact shape and sweet faces, and I think they would make good toys for young children because they have a lot of bits to grab hold of. The pattern, which has all the details to make both sizes, is now available in my Etsy shop.