Showing posts with label monster. Show all posts

Tuesday, 13 February 2024

Love Monster, with Free Amigurumi Heart Pattern


For Valentines Day I’ve made this cute little Love Monster, using my Adorable Monster pattern. I had some lovely pink fuzzy yarn that I’d saved for ages, and this seemed the perfect thing to make with it. I had to give him a heart to give to people he loves, so I’ve included the pattern to make that below.


Amigurumi Heart Pattern

This is a simple pattern to make a three-dimensional amigurumi heart that could be used for all sorts of things. Make it into a decoration, make several of them and display in a bowl or string together to hang on the wall. You could give one to someone you’ve fallen in love with, or stick pins in it if they break your heart!

Yarn required:

I used double knitting (DK) weight yarn, approximately 10g. You can use any colour you like, and any thickness of yarn, though you will need to adjust the amount and hook size. 

You will also need:

Stuffing.

Tapestry needle.

4 mm hook (US G hook).

Finished size: approximately 6 cm/2.5" tall.

Abbreviations:

ch = chain

st = stitch or stitches

sc = single crochet (US), double crochet (UK)

tog = together

sc2tog = decrease by working two sc together

FO = fasten off

Notes:

This heart is made in rounds, starting with the two rounded parts at the top which are then joined together by crocheting around and continuing to the point. Do not join rounds, use a stitch marker to mark the start of a round - a small piece of different coloured yarn placed under the stitch at the start of the round will do. To start a round, you can use the magic ring method, but I prefer to ch 2, then work sc into 1st ch. If you work the sc over the tail of yarn as well you can use that to pull the hole tight. Whichever method you use, always make sure that there is no hole in the first round before you continue.


Top of heart (make 2):

Round 1: ch 2, work 6 sc into 1st ch - 6 st.

Round 2: 2 sc in each st around - 12 st.

Round 3: [2 sc in next st, sc in next st] 6 times - 18 st.

Round 4 - 6: (3 rounds) sc in each st around - 18 st.

-For first piece, FO leaving a length of yarn.

-For second piece, do not FO.

Rest of heart:

-Join the two pieces, leaving 3 st not joined between the two pieces, using the following instructions:

Round 7: sc into 4th st of first piece, sc in next 14 st, sc into 4th st of second piece, sc in next 14 st - 30 st.

Round 8: sc in next 6 st, sc2tog, sc in next 13 st, sc2tog, sc in next 7 st - 28 st.

Round 9: sc in next 6 st, sc2tog, sc in next 12 st, sc2tog, sc in next 6 st - 26 st.

Round 10: sc in next 6 st, sc2tog, sc in next 11 st, sc2tog, sc in next 5 st - 24 st.

Round 11: sc in next 6 st, sc2tog, sc in next 10 st, sc2tog, sc in next 4 st - 22 st.

-Sew up the hole between the two original pieces using the length of yarn from the first piece.

-Start to stuff and continue as you go along.

Round 12: sc in next 5 st, sc2tog, sc in next 9 st, sc2tog, sc in next 4 st - 20 st.

Round 13: [sc2tog, sc in next 3 st] 4 times - 16 st.

Round 14: [sc2tog, sc in next 2 st] 4 times - 12 st.

Round 15: [sc2tog, sc in next st] 4 times - 8 st.

Round 16: sc in next st, sc2tog, sc in next 2 st, sc2tog, sc in next st - 6 st.

-Finish stuffing and sew up hole at bottom.


This pattern is also available to download from Ravelry, and the Adorable Monster pattern can be bought on Etsy and Ravelry.


Wednesday, 10 February 2021

Yeti and Bigfoot pattern - new method to make arms

I recently had a message from someone who was having problems making the arms for the Yeti from my Yeti and Bigfoot pattern, They are made from the fingers upwards and the technique can be quite fiddly to get to grips with. Otherwise the pattern is quite a straightforward one for people fairly new to making amigurumi, so I thought it would be good to try to make the arms easier to crochet. 

So, the pattern now includes the additional information on how to make the arms from the top down, which makes the fingers much easier to crochet. I still slightly prefer the way the original method looks, but there's not very much in it. If you've already bought the pattern you should be able to download it again and get the new version of the pattern. Contact me on the site where you bought it if you have any problems with this.


The new versions of the hands, small at top, big at bottom.


Sunday, 16 August 2020

Fuzzy Troll Amigurumi

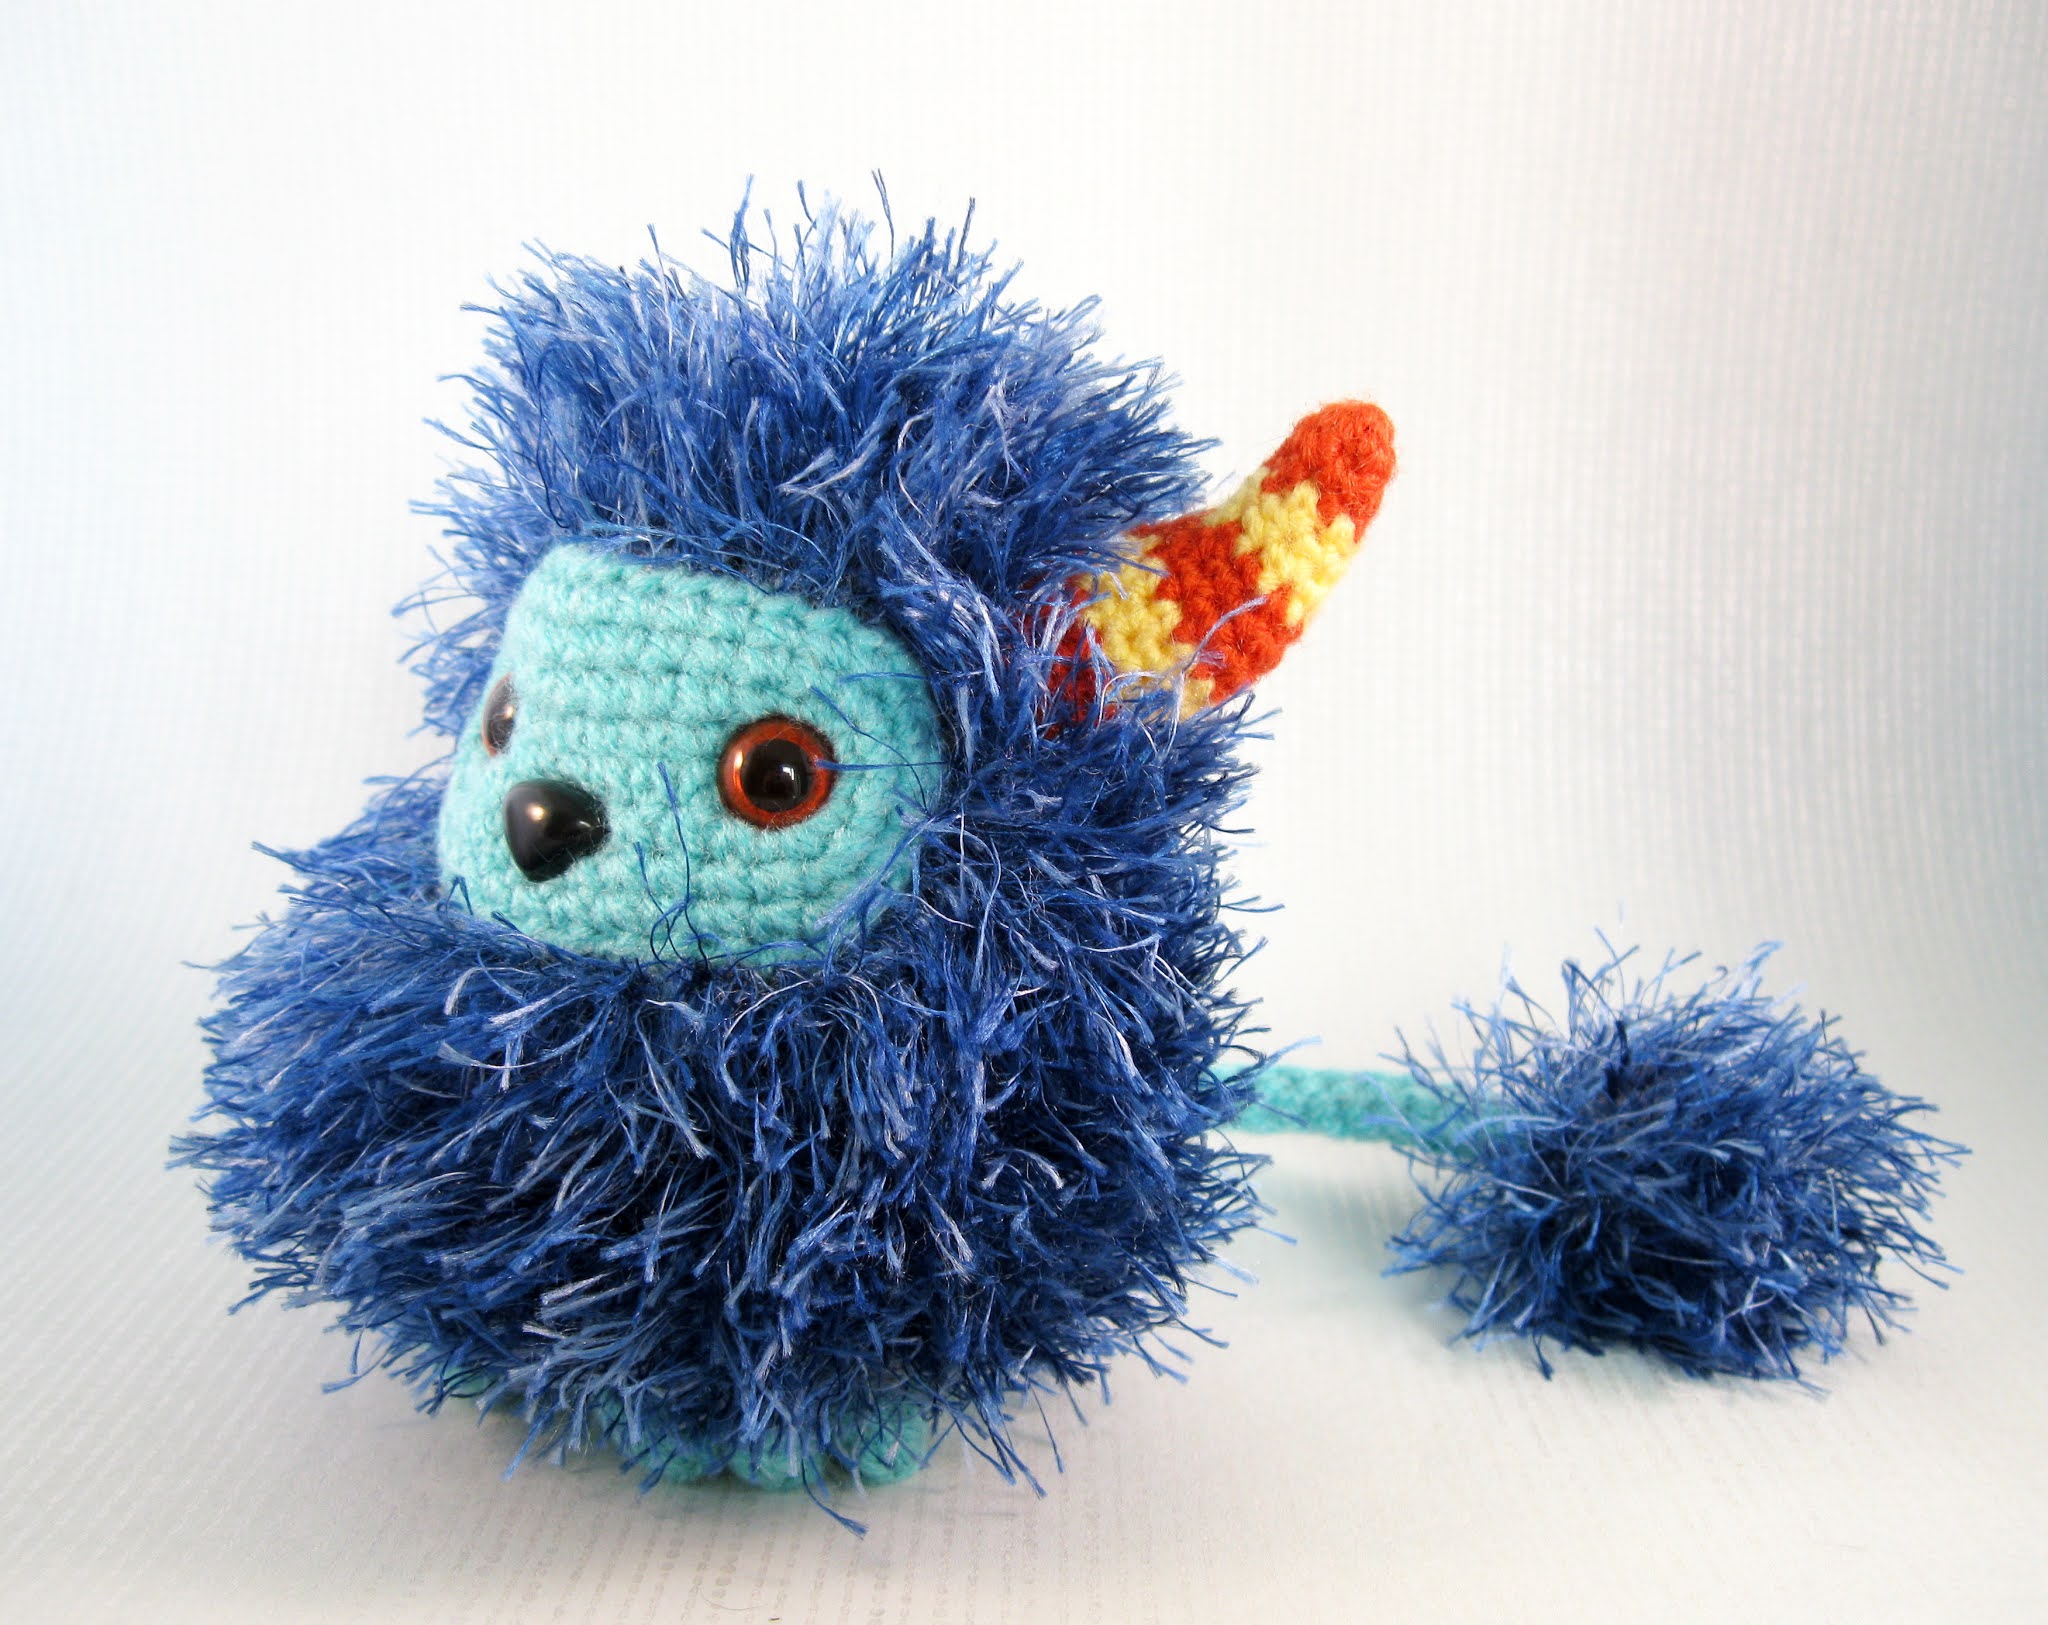
Whenever I go into a yarn store, I can't help but be tempted by those fuzzy fun fur-type yarns, they look so fluffy and tactile. The sort of yarns I'm talking about, sometimes called eyelash yarn, have a thread base with strands sticking out from this. Back when I had just started making amigurumi I bought quite a lot of them, in all sorts of different colours, and then I had to work out what to do with them. I ended up using them to make Fuzzy Trolls for my children, but until now I hadn't got round to turning this design into a pattern.

These trolls are friendly little creatures, who love nothing more than relaxing in a meadow filled with wildflowers. They are brightly coloured, with horns and long fuzzy-ended tails, and the pattern gives you all the details you need to make either a large (15cm/6" tall) or small (12cm/5" tall) fuzzy troll.


My new pattern is available on Etsy and Ravelry, and because using fuzzy yarn can be a bit challenging, I have created a series of videos to take you through the whole process of making a Fuzzy Troll, which you can find on this playlist on my YouTube channel. 
Here is the first video, which tells you how to choose the fuzzy yarn you need.

Along with the pattern, you can work your way through all the videos in order and they will guide you through everything you need to do, or you can just check out any elements that you are unsure of.

This is my first time making video crochet tutorials, so I hope you find them helpful. They show a lot of tips and tricks as to how to make various elements of amigurumi, so you might find it useful to watch them, even if you're not making a troll. In the future I'd like to make some more, perhaps showing how to make some of my small free patterns in detail, hopefully that will be helpful to anyone who's new to making amigurumi.

Wednesday, 30 October 2019

Little Monster Finger Puppets - free crochet pattern


Here's a little treat for Halloween that's quick and simple to crochet.


You will need:
Small amount of yarn for the body, any colour you like (I think green or purple looks good).
Small amount of red yarn for the mouth and eyes.
Small amount of black yarn for eyes.
Tapestry needle.
3.5mm crochet hook (US E hook).

Finished size: approximately 4 cm/1.5” tall.

Abbreviations:
ch = chain
st = stitch or stitches
ss = slipstitch
sc = single crochet (US), double crochet (UK)
dc = double crochet (US), treble crochet (UK)
hdc = half double crochet (US), half treble crochet (UK)
BLO = back loop only
FLO = front loop only
tog = together
sc2tog = decrease by working two sc together
bob = bobble (see special stitch instructions)
FO = fasten off

General instructions:
This pattern is written using US crochet terms. For the UK equivalents, see abbreviations list.

Work in rounds unless otherwise stated and do not join rounds unless told to. Use a stitch marker to mark the start of a round - a small piece of different coloured yarn placed under the stitch at the start of the round will do. To start a round, you can use the magic ring method, but I prefer (ch2, work 6 sc into 1st ch). If you work the 6 sc over the tail of yarn as well you can use that to pull the hole tight. You can find a detailed tutorial on how to do this here on my blog.

Work through both loops of stitches unless otherwise indicated.

Special stitch instructions:
3 dc bob: bobble stitch for nose. YOH (yarn over hook), insert hook into next stitch, YOH and pull through loop, YOH, pull through 2 loops, *YOH, insert hook into same stitch, YOH and pull through loop, YOH, pull through 2 loops, repeat once from*, YOH, pull through all 4 loops on hook.


Start with yarn for body.
Round 1: ch 2, work 6 sc into 1st ch - 6 st.
Round 2: 2 sc in each st around - 12 st.
Round 3: [2 sc in next st, sc in next 3 st] 3 times – 15 st.
Round 4: sc in each st around - 15 st.
Round 5: sc in next 6 st, 3 dc bob in next st, sc in next 8 st – 15 st.
Round 6: sc in next 4 st, [FLO: sc in next st, 2 hdc in next st, hdc in next 2 st, 2 hdc in next st, sc in next st], sc in next 5 st – 17 st.
Round 7: sc in next 4 st, change to red yarn, [work in back loops remaining from working in front loops in previous round: hdc in next 6 st], change to body yarn, sc in next 5 st – 15 st.
Cut red yarn, leaving a length to sew the eyes. Sew 4-5 lines vertically over rounds 3 and 4 on either side of the nose. Use black yarn to sew a dot in the centre of each eye. Secure ends of yarn.
Round 8: sc in next 5 st, [FLO: sc in next st, 2 hdc in next st, hdc in next st, 2 hdc in next st, sc in next st], sc in next 5 st – 17 st.
Round 9: sc in next 5 st, [work in back loops remaining from working in front loops in previous round: hdc in next 5 st], sc in next 5 st – 15 st.
Round 10: sc in next 3 st, [arm: ss into next st, ch 7, turn, ss into next 2 ch, (ch 3, turn, ss in next 2 ch) 2 times, ss into next 4 ch, ss back into original st on round], sc in next 7 st, [arm], sc in next 3 st - 15 st.
Round 11: sc in each st around (work into the first ss used to make each arm, not the final ss) - 15 st.
Round 12: sc in each st around - 15 st.
Ss in next st, FO and weave in end of yarn.

Stick it on your finger and have some monstrous fun!


Wednesday, 21 October 2015

Yeti and Bigfoot Amigurumi Pattern


When I first started designing patterns I often made things using fuzzy mohair type yarn, which I then brushed to make cute, furry creatures, including my Adorable Monsters. Unfortunately, mohair yarns have become a lot less fashionable since then, and you can often only find very lightweight ones, which are no good for making amigurumi at a reasonable size. I did make some Adorable Monsters using normal yarn, but I decided to have another go, and make a little Yeti and Bigfoot.

I still wanted to give their fur a bit of texture, so this time I used Stylecraft Alpaca DK, an acrylic yarn with 20% alpaca in the mix. I find it works well for amigurumi animals as it has a really nice, soft and furry feel to it - I used it for my Alpaca Family and Bracken the Fox.

I made a little Bigfoot, tweaking the pattern slightly to give it a thumb, and I was really happy with the way it looked. I then thought it would be nice to have a larger version, something it would be a bit easier to cuddle. If you want to make a larger version of an amigurumi, there isn't any formula to do it. You just have to work your way through it, with an idea of what you want it to look like, and use trial and error to get it right. And some things don't scale up easily - it took a while to work out how to make the bigger fingers and toes when the popcorn stitches I used were just the right size for the original. I decided to make the big version with proportionally longer legs, but otherwise they're very similar.


Once I was happy with both the patterns, I made a pair of Yeti to go with the Bigfoots (Bigfeet?). As I was making the little one, I decided to see what the feet would look like sewn to the front, so it's sitting down, and I thought it looked really cute. The standing version of the little Bigfoot is only 6 inches tall, so the little sitting Yeti fits in your hand rather nicely. The bigger versions are 9 inches tall, and definitely just right for a cuddle.


So, if you'd like to make yourself a cute monster family, you can get the pattern from Etsy or Ravelry. I think they're cute on their own, but even cuter together.


Tuesday, 18 September 2012

Dalek Amigurumi Pattern


I'm a long time fan of Doctor Who - I started watching Jon Pertwee in the 1970s when I was very little, and I've loved it ever since, old series and new. The Daleks are a brilliant creation, scary and iconic, and I just had to crochet them. I made three a few years back, two for swaps and one for a present, but I never made any for myself. With the new season of Doctor Who just starting (and with the first episode featuring a selection of different types of Daleks) I knew I had to make them again.


I tweaked my original pattern a bit and came up with a design I'm really happy with. It's quite fiddly to make, but it has most of the essential details. I've made a classic grey and black Dalek from the 1970s and a bronze and gold one from the new series. However fearsome the real Daleks are, when they're reduced to 7 inches tall and made of yarn, they're suddenly much more cute and cuddly, and fun to play with. One of mine found a wig I'd made for something else and decided he'd look good in it. I can't decide if he looks like Boris Johnson or if it's one of Captain Kirk's!


You can download the PDF of the pattern from Etsy or Ravelry

Friday, 2 March 2012

Flappy Owls, and lots of other stuff I've been making

I don't seem to have posted here for a while, but I've definitely been busy.

I have just finished testing my Flappy Owl pattern, that appeared in Inside Crochet magazine last year. I can now sell it myself, so I made two more owls to test it, and because I wanted to see what Hedwig would look like in a pullover! It's a fun pattern to make, and I would love to try out all sorts of different colour combinations. You can buy the pattern in my Etsy shop.


Over the winter I've been working on all sorts of amigurumi, for friends, presents, and even for myself. I'm a fan of the old tv show, Blake's 7, and so I made a friend a little Blake and Avon. They were finished late just before conventions so I didn't get good photos, but here's one he took:


I also made myself one of the creatures that appears in one of the episode, a hairy, horned critter called Og, to take to the convention.


I then decided to make a present for one of my nephews. As he likes Romans I thought I'd make him an amigurumi one, and because I'm a Doctor Who fan I based it on Rory. I had a lot of fun making the helmet.

Then, as a present to myself, I used the same basic pattern I'd been using for Rory, Blake and Avon and made a little Frodo, with a removable cloak. I'll probably develop this pattern so it could be used to make all sorts of other characters.


I've also been busy making various fun little toys for our school's Christmas bazaar, so I'll start writing up the patterns for those and posting them here. And I've been working on my Totoro patterns, improving them and coming up with a version of the grey totoro as well as smaller versions of the blue and white ones. I'll be posting the completed patterns for those very soon.

Friday, 20 August 2010

My patterns for sale on Etsy

Just for reference, I'm putting a list here of the crochet patterns I usually have for sale on Etsy. These are all normally available, with all the details about the materials and skill level needed to make them, at lucyravenscar.etsy.com. If any of them are missing from my shop, just contact me and I'll relist them.

You can also buy most of my patterns, and download several free ones, from Ravelry. and  LoveCrochet


**Updated May 2016**

Star Wars Mini Amigurumi Patterns:

 Slave Leia


Dragonet Amigurumi Pattern:


Adorable Monster Amigurumi Pattern:

Small Spirit Pattern:

Flora the Elephant Amigurumi Pattern:


Witch and Wizard Amigurumi Pattern:


More details here.


Woolly Jumpers Amigurumi Pattern - Rabbit and Lamb:

Chubby Gnomes Amigurumi Pattern:

Tooterphants Amigurumi Pattern:


Mother and Child Spirits Amigurumi Pattern:

Flappy Owl Amigurumi Pattern:

Little Folk Amigurumi Pattern:


Finn and Jake Amigurumi Patterns: 


Woolly Monkey Amigurumi Pattern:


Wee Mousie Amigurumi Pattern:


Baby Elephant Pattern:


Halfling Pattern:


Elf Pattern:


Dwarf Pattern:


Alpaca Family Pattern:


Yeti and Bigfoot Pattern:


Cuddly Dragon Pattern:


Little Monkey Pattern:


Bracken The Fox Pattern:


Mini Pets Patterns - Snails, Bugs and Frogs:


Roman Soldier Pattern: