Thursday, 8 September 2011
A Tower of Tooterphants!
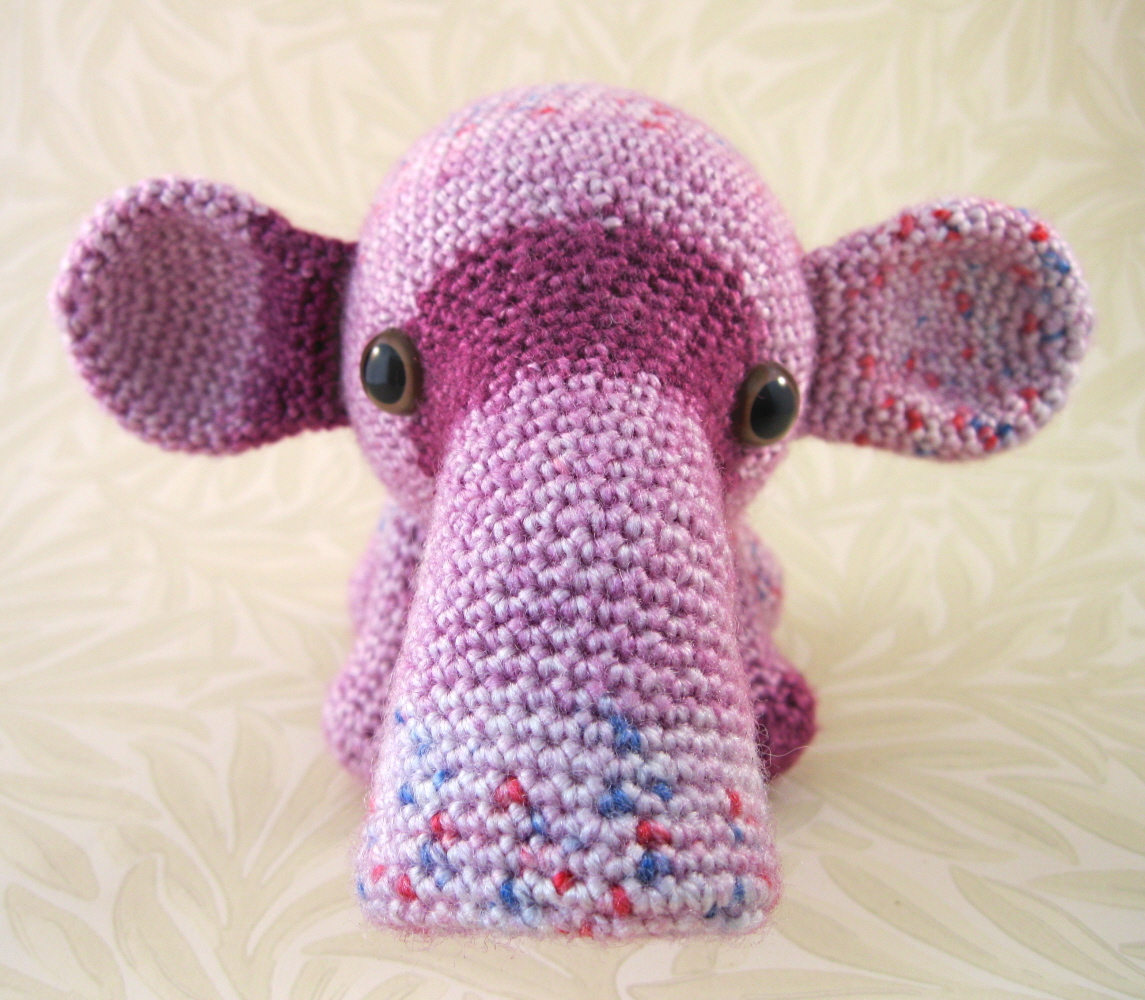
Tooterphants are friendly little creatures, similar in shape to elephants, if not in size. However, they have wide trumpet-shaped trunks that they use to make tooting noises to communicate with one another. They also use their trunks, or tooters, to suck up their food - should you want to attract one, leave a trail of interesting treats such as raisins and they may follow it. They live in groups, and enjoy acrobatic games where they climb on top of each other to form a tower of Tooterphants - luckily their rounded shape makes them bouncy, so they don't mind when they fall down.
These cute creatures are based on patterns I'd made in the past - several years ago I made an Eater of Socks for a swap, based on the description of a creature that appears briefly in Terry Pratchett's Hogfather. Given that it eats odd socks, I gave it a wide trunk/snout to suck them up, and made its legs striped like socks to act as camouflage. Then, a few years later, I made a Sky Elephant, using the previous pattern as a base, but making it bigger. The Sky Elephant was made from blue and white variegated yarn and had fluffly cloud-like ears.
So, I went back and revisited these patterns. I had some nice self-striping yarn that I wanted to try out (King Cole Splash DK), and I thought these would be the perfect patterns to use to show off all the colours nicely. I made a few minor changes, but I liked the patterns pretty much as they were. They have a nice compact shape and sweet faces, and I think they would make good toys for young children because they have a lot of bits to grab hold of. The pattern, which has all the details to make both sizes, is now available in my Etsy shop.
Labels:
amigurumi,
animal,
child,
children,
crochet,
cute,
elephant,
fantasy,
handmade,
kids,
pattern,
sweet,
toy
Friday, 19 August 2011
Mother and Child Spirits
I made a set of Mother and Child Earth Spirits about two years ago, and they've always been one of my favourite creations. I've also had quite a few requests for me to write up their pattern, and now I've finally got it finished, and available in my shop.
One of the problems with making these is getting hold of nice mohair yarns that are the right thickness. The yarn I originally used, Patons Spirit, is no longer being produced, although I've still got a small stash of it. It is also thicker than most of the other plain mohair yarns I have, many of which I picked up from charity shops without labels. I bought some Luxury Mohair by King Cole, which has lovely colours but is comparatively thin, and when I tested my pattern using this yarn, the Water Spirits ended up quite a bit smaller than the Earth Spirits I made using the Patons yarn. In the end though, despite the size difference, I was happy with both yarns and the creatures I made with them.
I think that what I like most about these creatures is the way they seem to interact when you put them together. It feels like the mother is looking after her child, or even listening to him telling her what he's been up to!
Labels:
amigurumi,
animal,
crochet,
cute,
dream,
earth,
fairy,
fantasy,
furry,
fuzzy,
geek,
gnome,
little folk,
magic,
nature,
pattern,
spirit,
spirits,
sprite,
strange
Dobby the House Elf
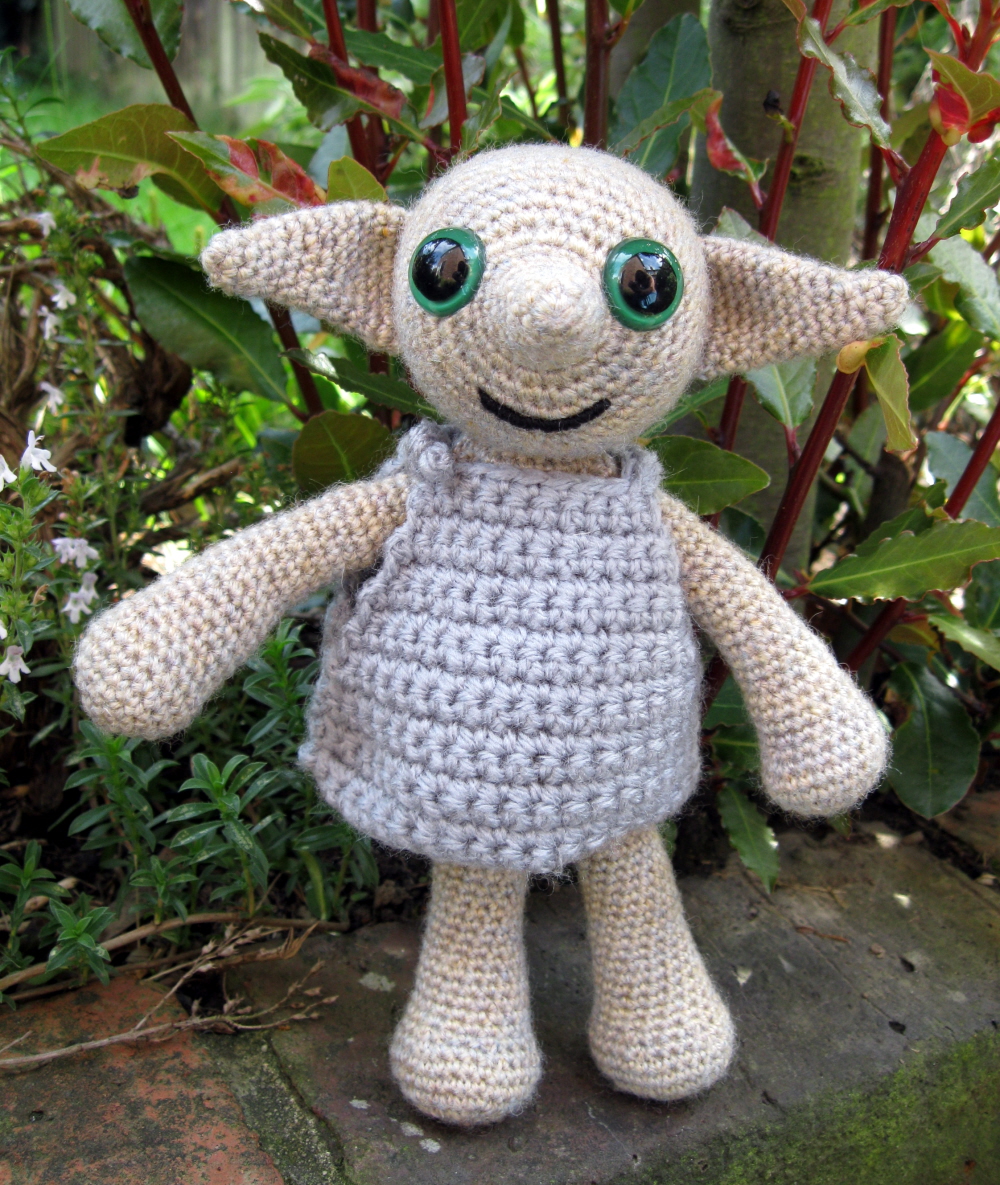
When we rewatched Harry Potter and the Deathly Hallows part 1 recently, my 9 year-old son got very sad at the part when Dobby dies. He would not be comforted, and kept insisting that he hated JK Rowling for killing off his favourite house elf. In the end, I had to promise to crochet him his own little Dobby.
I used a pattern that I had worked out when I made this Grey Hobgoblin, I just didn't give him the furry hair or a tail.
I had wanted to dress Dobby as he's described in the books after he becomes a free elf, with shorts, a tie, mis-matched socks and a tea cosy for a hat. However, my son (who hasn't read the books) wanted him to look the way he does in the films, so I crocheted a smock-like garment that's supposed to look like his pillowcase. I might have looked better made of fabric, but I always find it easier to make things out of yarn. Anyway, my son loved him, so that's all that counts!
I used a pattern that I had worked out when I made this Grey Hobgoblin, I just didn't give him the furry hair or a tail.
I had wanted to dress Dobby as he's described in the books after he becomes a free elf, with shorts, a tie, mis-matched socks and a tea cosy for a hat. However, my son (who hasn't read the books) wanted him to look the way he does in the films, so I crocheted a smock-like garment that's supposed to look like his pillowcase. I might have looked better made of fabric, but I always find it easier to make things out of yarn. Anyway, my son loved him, so that's all that counts!
Sunday, 24 July 2011
Flappy the Owl in Inside Crochet!
I'm very excited! My pattern for Flappy the Owl has won a competition to be featured in a UK crochet magazine, Inside Crochet, issue 20. You can see him on their Facebook page or at Yudu, where you can see the front cover and the first couple of pages. I love the photo of Flappy with a little suitcase.
Here are some of my photos that I took before I sent him off. He's about a cute little owl wearing a stripy sweater and is 6.5" tall. I had fun coming up with various techniques to make the ribbed parts of the sweater, and his claws and beak. I made a prototype which my son claimed - I knew the design was good when I saw how much he like Flappy (he named him too!).
If you're not aware of Inside Crochet, it's a great magazine. In the UK I go into the newsagents and see five or six knitting magazines, but only one crochet magazine. It's only been going for 20 issues, but I hope that it's going to help popularise crochet in the UK - maybe people will eventually stop asking what I'm knitting! It's well put together, modern and up-to-date, and always has a really good selection of patterns - clothing, accessories, jewelry, toys and things for the home. This is not me advertising for them, by the way, it's just my observation. It's not just my opinion either, check out this blogpost from another admirer.
Here are some of my photos that I took before I sent him off. He's about a cute little owl wearing a stripy sweater and is 6.5" tall. I had fun coming up with various techniques to make the ribbed parts of the sweater, and his claws and beak. I made a prototype which my son claimed - I knew the design was good when I saw how much he like Flappy (he named him too!).
If you're not aware of Inside Crochet, it's a great magazine. In the UK I go into the newsagents and see five or six knitting magazines, but only one crochet magazine. It's only been going for 20 issues, but I hope that it's going to help popularise crochet in the UK - maybe people will eventually stop asking what I'm knitting! It's well put together, modern and up-to-date, and always has a really good selection of patterns - clothing, accessories, jewelry, toys and things for the home. This is not me advertising for them, by the way, it's just my observation. It's not just my opinion either, check out this blogpost from another admirer.
Thursday, 19 May 2011
Fierce Little Dragon
One of the first crochet patterns I wrote was for a dragon - my 'fierce but friendly really dragon'. I love dragons, and it's hard to find nice toys of them, so that was a real incentive to make one myself. Lots of people liked it and asked for the pattern, so eventually I wrote up my notes and put them on Craftster and Livejournal. The notes were quite rough, and though many people had no problem following them, some asked if I could write the pattern up properly. And, finally, I got round to it!
I had to make a dragon to check the pattern, and while I was doing that I tweaked a few bits - I used to crochet a lot more loosely, and I found some parts came up too small - and I used different stitches on the wings to make them much stiffer.
I won't post the pattern here as it's seven pages long, but it is available as a free download from Ravelry: Fierce Little Dragon free pattern
Edited to add: this pattern has now been translated into Spanish by Ana, over at her blog.
Edited to add 2: this pattern has now kindly been translated into French by FilACroche on Ravelry. You can download it here
Labels:
amigurumi,
animal,
crochet,
dragon,
fantasy,
free pattern,
geek,
harry potter,
lord of the rings,
magic,
tutorial
Wednesday, 13 April 2011
Little Eggie Amigurumi Pattern

Materials:
Small amount of yarn, any colour you like. Thickness is not too important - I used double knitting (dk) but a bit thicker would be fine too.
Black yarn to embroider the mouth.
One pair 6mm safety eyes.
3.5mm hook (US E hook).
Stuffing.
Tapestry needle.
Abbreviations:
ch = chain
st = stitch or stitches
sc = single crochet (US), double crochet (UK)
dc = double crochet (US), treble crochet (UK)
ss = slip stitch
tog = together
sc2tog = decrease by working two sc together
FO = fasten off
Special stitch instructions:
3 dc bob: bobble stitch for hands and feet. YOH (yarn over hook), insert hook into second ch from hook, YOH and pull through loop, YOH, pull through 2 loops, *YOH, insert hook into same stitch, YOH and pull through loop, YOH, pull through 2 loops, repeat once from*, YOH, pull through all 4 loops on hook.
Little Eggie is made in rounds. Do not join rounds, use a stitch marker to mark the start of a round - a small piece of different coloured yarn placed under the stitch at the start of the round will do.
Round 1: Ch 2, work 6 sc into 1st ch - 6 st.
Round 2: 2 sc in each st around - 12 st.
Round 3: [2sc in next st, sc in next 3 st] 3 times – 15 st.
Round 4: [2sc in next st, sc in next 2 st] 5 times – 20 st.
Round 5 – 6: (2 rounds) Sc in each st around – 20 st.
Round 7: [2sc in next st, sc in next 3 st] 5 times – 25 st.
Round 8 – 10: (3 rounds) Sc in each st around – 25 st.
Round 11: Sc in next 6 st, [make arm: ss into next st, ch 7, 3 dc bob into 2nd ch from hook, ss into next 5 ch, ss back into original st], sc in next 11 st, [make arm as before], sc in next 6 st - 25 st.
Round 12: Sc in each st around – 25 st (you sc into the first ss used to make each arm).
Fit eyes between rounds 9 and 10.
Round 13 – 15: (3 rounds) Sc in each st around – 25 st.
Round 16: [Sc2tog, sc in next 3 st] 5 times – 20 st.
Round 17: Sc2tog, sc in next 2 st, sc2tog, [make leg using the same method as the arm], sc in next st, sc2tog, sc in next 2 st, sc2tog, [make leg], sc in next st, sc2tog, sc in next 2 st – 15 st.
Stuff Eggie and embroider mouth.
Round 18: [Sc2tog, sc in next st] 5 times – 10 st.
Round 19: [Sc2tog] 5 times – 5 sc. FO.
Complete stuffing and sew up hole neatly.
Labels:
amigurumi,
child,
children,
creature,
crochet,
cute,
easter,
egg,
fantasy,
free pattern,
handmade,
kids,
mini,
tiny,
toy,
tutorial
Tiny Chick - Free Amigurumi Pattern
This miniature chick is only 1.5" tall, so he'd make a cute little extra for Easter.
Materials:
Small amount of pale yellow yarn, double knitting (dk) weight.
Black yarn to embroider the eyes.
Dark yellow or orange yarn to embroider the beak.
3.5mm hook (US E hook).
Stuffing.
Tapestry needle.
Abbreviations:
ch = chain
st = stitch or stitches
sc = single crochet (US), double crochet (UK)
hdc = half double crochet (US), half treble crochet (UK)
ss = slip stitch
tog = together
sc2tog = decrease by working two sc together
FO = fasten off
This chick is made in rounds. Do not join rounds, use a stitch marker to mark the start of a round - a small piece of different coloured yarn placed under the stitch at the start of the round will do.
Round 1: Ch 2, work 6 sc into 1st ch - 6 st.
Round 2: 2 sc in each st around - 12 st.
Round 3: [2 sc in next st, sc in next st] 6 times – 18 st.
Round 4 – 7: (4 rounds) Sc in each st around – 18 st.
Round 8: Sc in next 4 st, [make wing: ss into next st, ch 4, hdc into 2nd ch from hook, hdc in next 2 ch, ss back into original st], sc in next 8 st, [make wing as before], sc in next 4 st - 18 st.
Round 9: Sc in each st around – 18 st (you sc into the first ss used to make each wing).
Round 10: [2 sc in next st, sc in next 5 st] 3 times – 21 st.
Round 11: [2 sc in next st, sc in next 6 st] 3 times – 24 st.
Round 12 – 13: (2 rounds) Sc in each st around – 24 st.
Start to stuff. Embroider eyes and beak with French knots - wind the yarn round the needle twice for the eyes, and four or five times for the beak.
Round 14: [Sc2tog] 6 times – 12 st.
Round 15: [Sc2tog] 6 times – 6 sc. FO.
Complete stuffing and sew up hole neatly.
Labels:
amigurumi,
animal,
chick,
child,
children,
crochet,
cute,
easter,
egg,
free pattern,
handmade,
keychain,
keyring,
kids,
tiny,
tutorial
Subscribe to:
Posts (Atom)